No sé si os pasa, pero creo que hace
ya un tiempo alguien me insertó un chip en el cerebro que a veces me
lleva a hacer cosas irracionales. Es el chip de no tirar nada, de
dejar el plato limpio como una patena aunque a la mitad vaya a
reventar. A veces es una muy mala costumbre pero no lo puedo evitar.
No recuerdo haber sido víctima del lavado de cerebro de “con la de
hambre que hay en el mundo...” pero así es. Tirar comida me da un
cargo de conciencia bastante chungo y eso que de pequeña era
especialista en alimentar el cubo de la basura con menestras y
champiñones.
Hoy os traigo una receta de
aprovechamiento al cuadrado. Ya una vez os enseñé que con sobras de puré de patatas se pueden hacer rieskas y hoy os voy a enseñar qué
hacer con las sobras de rieskas, aunque esto está tan bueno que bien
merece la pena comerlas así desde el principio.
Rieskapizza de tomate, rúcula y jamón
serrano
Ingredientes (para 2 personas):
6 rieskas pequeñas
1 tomate hermoso
1 bola de mozzarella de búfala
1 puñado de rúcula
Unas lonchas de jamón serrano
Aceite de oliva virgen extra
Modus operandi:
1. Precalienta el horno a 200 C.
2. Lava el tomate y córtalo en rodajas
finas. Pon una o dos rodajas de tomate sobre cada rieska y unos
pedacitos de mozzarella. Hornea las rieskas durante 10 minutos.
3. Cuando estén listas, coloca unas
lascas de jamón serrano y unas hojas de rúcula sobre cada rieska.
Termina con unas gotas de aceite de oliva sobre la rúcula.
Así de fácil y así de bueno.
*****
Leftovers of leftovers
I don't know if it happens to you but
some time ago someone inserted a chip in my brain that makes me do
irrational things from time to time. It's the chip of “not throwing
food to trash”, of leaving the dish clean in every meal even though
in some point I can hardly continue eating. Some times it's a very
bad habit but I can't help myself. I don't remember being a victim of
the brainwash of “there are lots of people starving in the
world...” but this is it. Throwing food to trash makes me feel
remorse (even though when I was a kid I was expert in filling the
trash bin with vegetable stew and mushrooms).
Today I bring you a recipe using
leftovers of leftovers. Once I already showed you that with mashed potatoes leftovers you can make rieskas and today I'm gonna show you
what to do with rieskas leftovers (but this is so good that could be
easily the first destination for your rieskas).
Tomato, rocket and cured ham
rieskapizza
Ingredients (serves 2):
6 small rieskas
1 big tomato
1 ball of mozzarella di bufala
1 handful of rocket
Some slices of cured ham
Extra virgin olive oil
Modus operandi:
1. Preheat the oven to 200 C.
2. Wash the tomato and slice it
finely. Place one or two slices of tomato and some pieces of
mozzarella on each rieska. Bake the rieskas for 10 minutes.
3. When ready, put some slices of ham
and some rocket leaves on each rieska. Finish adding some olive oil
drops over the rocket.
Como cualquier excusa es buena para darse un homenaje, hoy vamos a celebrar el cambio horario con una merendola de domingo como mandan los cánones. Yo no necesito mejor excusa, no sé cómo lo veis vosotros…
Cuando fui a Italia hace un par de años, me estuve empapando bien sobre sitios donde comer en condiciones, reseñas y demás y me picó mucho la curiosidad a raíz de varios comentarios acerca de una famosa calzone de Nutella en el Trastevere. Al final, con tanta recomendación, no me dio tiempo a ir (mi estómago tiene sus dimensiones y son esas y no otras) y se me quedó la espinita de la pizza dulce clavada en lo más hondo. Entonces llegó el tercer habitante a esta casa (la piedra de hornear) y todo cambió.
La receta está preparada para piedra de hornear, pero podéis probar sin ella alargando el tiempo de horneado. El resultado no será el mismo, pero la pizza estará buena de todas formas.
1. Pon a precalentar el horno con la piedra a 250 C.
2. Espolvorea un poco de sémola en la mesa de trabajo y estira la masa de pizza todo lo que puedas. Unta la superficie con Nutella sin llegar a los bordes. Hornea la pizza durante 4 ó 5 minutos, no más, y siempre vigilando que la Nutella no se queme. Si la piedra está bien caliente este tiempo será suficiente para cocer la masa (si no tienes piedra, puedes hornear la masa sin Nutella más tiempo y untarla una vez fuera del horno).
3. Coloca unas rodajas de plátano y las pacanas sobre la pizza ya horneada. Espolvorea con canela y azúcar glass. Si quieres, puedes acompañar la pizza con una o dos bolas de helado de vainilla.
Feliz día del cambio horario!
*****
Sunday festival
Any excuse is good to cheer your body up with some good stuff, so today we are going to celebrate the change to Summer Time. I don’t need a better reason, do you?
When I went to Italy couple years ago, I investigated a lot about good places where to eat, reviews and so on and I got very curious after couple comments talking about a famous Nutella calzone in Trastevere. With so many other recommendations, finally I didn’t have time enough to go and try it (my stomach has its dimensions, they are huge but still have limits) and I couldn’t take that idea out of my mind anymore. Then the third resident of this house arrived (the baking stone) and everything changed.
The recipe is supposed to be done with a baking stone but if you don’t have one you can still try to make it keeping the pizza a bit longer in the oven. Not the same but good anyway.
2. Dust the working table with semolina and roll the pizza dough out as much as possible. Spread some Nutella on the surface keeping the edges clean. Bake the pizza for 4 or 5 minutes, not more, and always keeping an eye on the Nutella, it burns easily. If the stone is as hot as it should this time is enough (if you don’t have a baking stone, you can bake the dough without Nutella some more minutes and spread it when the pizza is already baked).
3. Place some banana slices and pecans all over the baked pizza. Dust with some icing sugar and cinnamon. If you want, you can also add one or two vanilla ice cream scoops.
Cuando uno se va fuera de su país se encuentra con que tiene que dar muchas explicaciones a la gente que va entrando en su nueva vida. Recopilando preguntas estándar se me ocurren unas cuantas, pero por supuesto la reina de todas ellas es: "¿por qué Finlandia?" A los finlandeses parece que les extraña un poco que alguien que viene de un país con sol, calorcito y chiringuitos pueda ser feliz en un lugar donde hace una semana que no subimos de -15 C.
Otra es “¿no echas de menos tu país?” (ahí, metiendo el dedo en la llaga…) y yo siempre contesto que echo de menos a mi familia y a mis amigos pero que al país en sí, todavía no me ha dado tiempo. Es cierto, llevo aquí ya 7 meses pero todavía no tengo grandes momentos de morriña. Morriñilla sí, pero controlada. Echo de menos lugares a los que solía ir (sobre todo a comer, una no tiene remedio), del día a día, el mercado, mis restaurantes favoritos, las tapitas… y si me preguntáis por algo en concreto seguramente os diré que echo de menos los macarrones al forno de Il Gondoliere. Bueno, los macarrones, después el heladito de stracciatella de Los Italianos y el Paseo de los Tristes para arriba y para abajo para aligerar el estómago.
Esa pasta de verdad, al dente, esa cazuela cubierta con masa de pizza para mojar en esa salsita que está… de muerte.
Cuando escribí el post sobre la gastronomía finlandesa, os comenté que había sufrido algunos impactos con ciertos platos típicos de aquí. El primero lo tuve mucho antes de pensar siquiera en mudarme, viendo la película Paha Maa (Tierra Helada) – atención: spoilers!! En un momento dado, una mujer policía es asesinada y cuando el marido y sus pequeños vuelven a casa tras el funeral, él les prepara un plato de pasta, por llamarlo de alguna forma. Básicamente cuece pasta y les da un bote que ketchup para que se la aliñen. Yo pensé que era una bonita forma muy finlandesa de mostrar ese dolor por la pérdida, ese padre destrozado que tiene que alimentar a sus hijos pero no tiene fuerzas para currarse una boloñesa, aunque sea industrial. Inocente de mí.
Aquí la pasta se aliña con ketchup. Sí, señoras y señores, con ketchup. Espero que a los que lo estén leyendo no les sangren los ojos como a mí los dedos de escribirlo, y por si acaso se pensaban que era broma ahí va la tercera: CON KETCHUP.
Y yo no soy italiana, ni experta en la materia, pero algo mejor se me da el asunto y no necesito preparar mi pasta con ketchup ni cocinarla en leche (¡¡¡sí, también!!!).
Así que allá vamos, en honor al chef de Il Gondoliere, que tan buenos ratos me ha dado. Ya sé que no se parece ni de lejos a la que sirven allí, ni tiene boloñesa, ni huevo cocido (y por supuesto, ¡no lleva champiñones!) pero a mí me ha sabido a gloria y si no he pedido el tiramisú de postre es porque después de hincarme esta cazuela, ya estaba haciendo la croqueta por el salón.
Pasta al horno con calabacín y gorgonzola dulce
Ingredientes (para 2 personas):
180 grs. de pasta corta (yo he usado macarrones tricolor)
2. Pica la cebolla, el pimiento y el calabacín y sofríelos en una sartén con un poco de aceite de oliva. Agrega la salsa de tomate, la crème fraîche, la albahaca (al gusto) y la mitad del gorgonzola en dados. Rectifica de sal y añade un poco de pimienta molida. Deja cocinar todo junto durante 10 minutos.
3. Cuece la pasta en abundante agua salada lo justo para que quede al dente. Cuando esté lista, escúrrela y añádela a la sartén con las verduras. Retira del fuego, mezcla bien y coloca la pasta en dos cazuelas individuales para horno. Cubre la pasta con la mozzarella y el gorgonzola que teníamos reservado.
4. Espolvorea la superficie de trabajo con un poco de harina y estira la masa de pizza hasta conseguir dos círculos. Cubre las cazuelas con ellos y espolvorea un poco de sal Maldon sobre la masa.
5. Hornea durante unos 10 minutos, o hasta que la masa se vea dorada y crujiente.
En dos palabras: Im-presionante.
*****
Tragicomedy
When you move abroad you usually live the same situation again and again (mostly at the beginning): you have to explain a lot of stuff to the people new in your life. Trying to remember which are the standard questions I’ve suffered, many of them come to my head, but the king of all of them is: “why Finland?” Finns have a problem to understand that someone who comes from a country full of sun, heat and “chiringuitos” is able to be happy in a place where it hasn’t been over -15 C for a week now.
Another one is “don’t you miss your country?” (thanks for the poke…) and I always answer that I miss my family and friends but not the country itself, because I didn’t have enough time for that yet. It’s true, I’ve been living here 7 months now but I still don’t have very big moments of homesickness. Maybe a little bit from time to time, but it’s under control. I miss the places I used to go (mostly to eat, that’s how I am), the market, my favorite restaurants, tapas… and if you ask for something concrete, I will probably answer I miss the maccheroni al forno from Il Gondoliere. Well, the pasta, then a delicious stracciatella ice cream at Los Italianos and finally a walk in Paseo de los Tristes to make my stomach work.
That real pasta, al dente, that clay casserole covered with pizza dough, really to be dipped in that sauce that is… deadly luscious.
When I wrote the post about the Finnish gastronomy, I told you I had some shocks with certain typical dishes from here. The first one happened long ago, even before I thought about moving here, while watching Paha Maa (Frozen Land) – warning: spoilers!! In one point of the movie a policewoman dies and when her husband and children go back to home after the funeral, the father prepares a “dish of pasta”. He basically boils pasta and gives the kids a ketchup bottle to season it. I thought it was a beautiful and very Finnish way to show his pain for the loss, a father who has to feed his children but is not strong enough to cook some Bolognese sauce, not even industrial. Innocent me.
In Finland pasta is dressed with ketchup. Yes, ladies and gentlemen, with ketchup. I hope, readers of mine, your eyes are not bleeding when you read this as my fingers are while I’m writing it. Just in case you think this is a joke I’ll tell you for the third time: WITH KETCHUP.
And I’m not Italian and not a pasta expert either but it seems I know something more about this business and I don’t need to dress my pasta with ketchup nor boil it in milk either (yeah, that too!!!).
So here we go. This is in honor of Il Gondoliere chef, who gave me so many good moments. I know this pasta is nothing compared with the one they serve there, it doesn’t have that Bolognese sauce or boiled egg (and of course, it doesn’t have mushrooms!) but it tasted like glory to me. And if I didn’t ask for the tiramisu after it, it’s just because I was rolling on myself over the living room floor after eating the whole casserole.
2. Dice the onion, bell pepper and zucchini and lightly fry it in a pan with a little olive oil. Add the tomato sauce, crème fraîche, basil (as much as you want) and half of the gorgonzola, diced. Season with salt and grounded black pepper. Let it cook all together for 10 minutes.
3. Boil the pasta in plenty of salted water until al dente. When ready, drain and add it to the pan with the vegetables. Mix well all the ingredients and place the pasta in two individual clay casseroles (if you don’t have, you can use other oven resistant casseroles). Cover the pasta with mozzarella and the reserved gorgonzola.
4. Dust the working surface with some flour and roll the pizza dough out to make two circles. Cover the casseroles with them and dust with some Maldon salt over the dough.
5. Bake for around 10 minutes or until the surface looks golden and crunchy.
Nada. Este año el invierno se está haciendo de rogar. Con lo que me gustan a mí unas manoplas y una guerra de bolas de nieve… parece que esta navidad no va a ser precisamente blanca.
Hablando de navidad, hace ya unos días que el señor Joulupukki (el que lleva los regalos a los niños en Finlandia) desfiló por el centro de la ciudad con su trineo, inaugurando esta temporada de vorágine consumista. Porque él pondrá los regalos, pero no me negaréis que los demás nos dejamos una pasta en el attrezzo.
Probablemente en la siguiente entrada os lo presente oficialmente, es un señor bastante peculiar procedente de un lugar perdido de la mano de dios en Laponia (pero según fuentes que merecen toda mi confianza, se mudó a su capital, Rovaniemi, por motivos comerciales). Y viste como un lapón. Y eso mola, ¿o no?
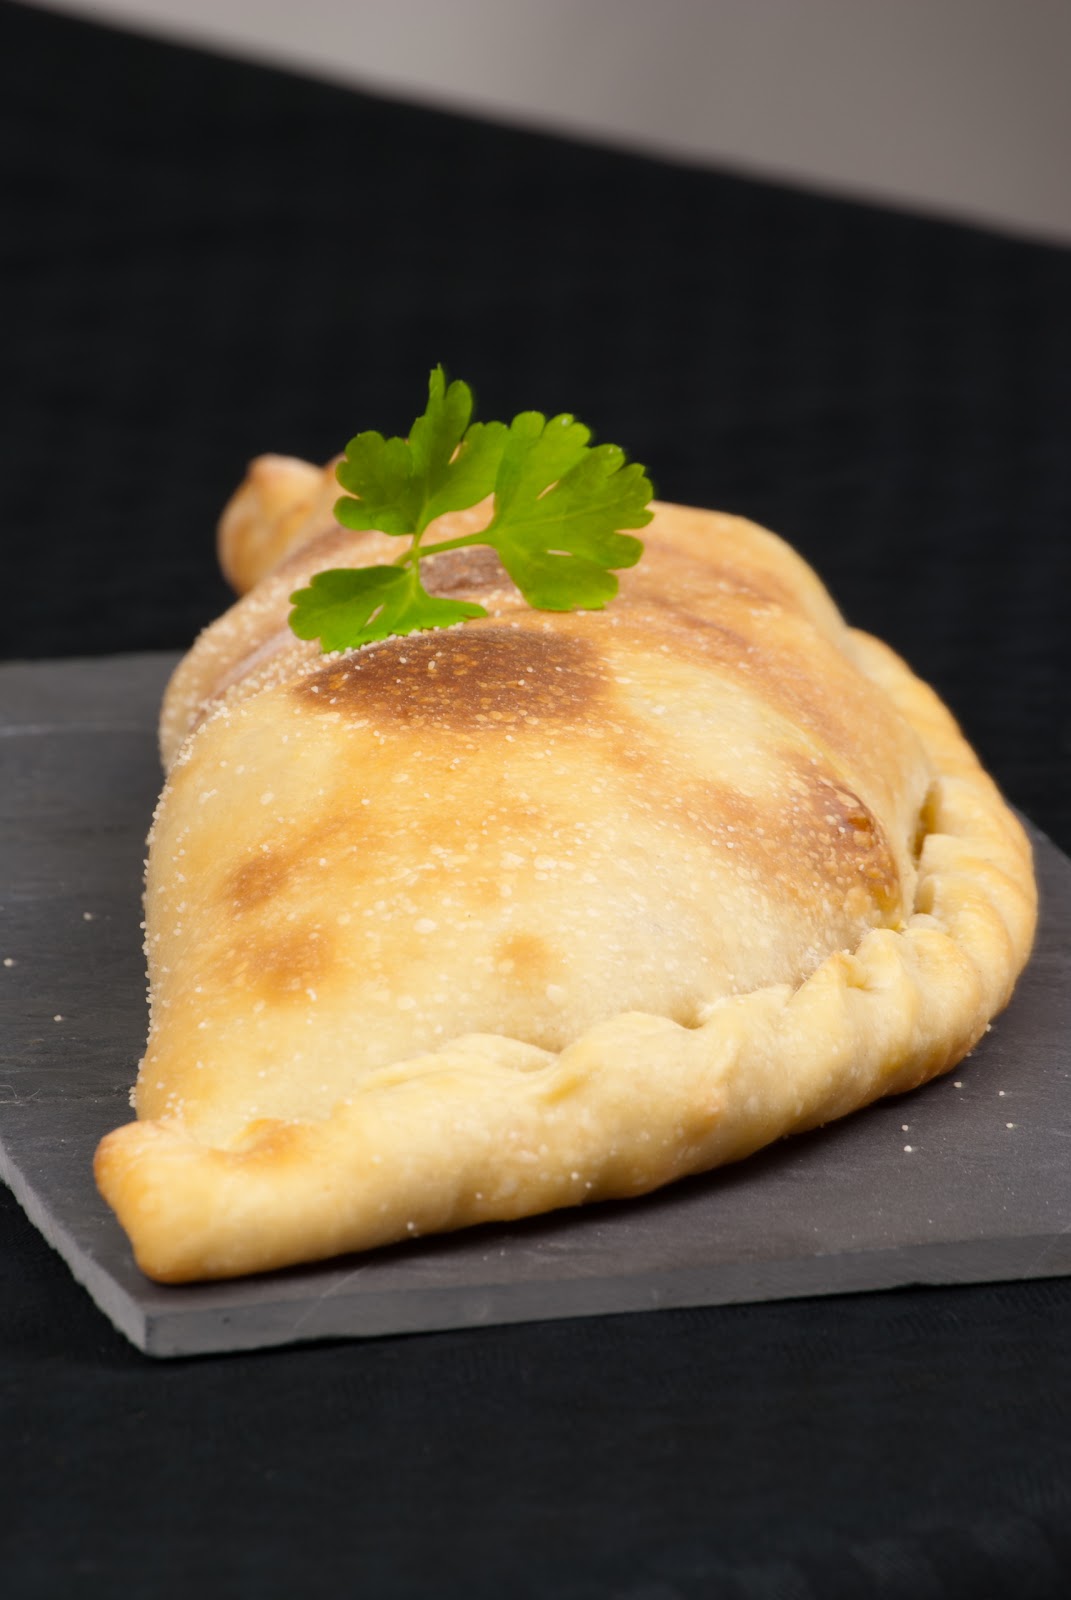
Por cierto, las cantidades son para dos calzones pero os sobrarán albóndigas para unas tapitas, que tampoco vienen mal. No sé vosotros, pero yo para 200 grs. de carne no me pringo. Ea.
1. Pon la carne con las especias y la sal en un bol. Pica ¼ de la cebolla finamente y añádela a la carne. Agrega el huevo y la miga de pan (desecha la corteza) remojada en leche y mezcla todo bien. Tapa con papel film y lleva el bol a la nevera durante 1 hora para que se mezclen bien los sabores.
2. Haz bolas medianas con la carne y rebózalas con harina de trigo. Fríelas en aceite a fuego medio y resérvalas en una cazuela.
3. Corta la cebolla en trozos grandes y fríela ligeramente en el aceite de las albóndigas. Añade las zanahorias y el tomate picados de la misma forma. Cuando estén listos, colócalos en el vaso de la batidora con una pizca de sal (sin el aceite). Bate hasta conseguir un puré espeso y añádelo a la cazuela de las albóndigas junto con el vino. Remueve un poco para que se integren el puré y el vino (con cuidado de no romper las albóndigas). Deja cocinar a fuego lento durante media hora.
4. Pon a precalentar el horno con la piedra a 190 C.
5. Divide la masa de pizza en dos. Espolvorea un poco de sémola en la superficie de trabajo y estira una de las masas hasta conseguir una base de 30 cm de diámetro. Coloca unas albóndigas y un poco de salsa sobre la mitad de la base, dejando limpios unos 3 ó 4 cm para cerrar la calzone. Cubre con mozzarella y un poquito de perejil fresco picado. Cierra la calzone (en este video Jamie Oliver explica cómo hacerlo). Repite la operación con la otra mitad de la masa.
6. Hornea la calzone durante unos 12 minutos o hasta que esté dorada.
¡Qué aproveche!
*****
No snow
Nothing. This year winter is playing too hard to get. I love a pair of mittens and a good snowball war but it seems this Christmas is not going to be exactly “white”.
About Christmas, some days ago Mr. Joulupukki (the one who brings gifts to Finnish children) paraded with his sleigh in downtown, opening this season of materialistic maelstrom. Because I don’t have any doubts that he brings the gifts… but we spend a lot of money in the attrezzo.
In the next post I will probably introduce him to you officially. He’s a quite peculiar man from somewhere lost in the middle of Lapland (but some trustworthy resources informed me that he moved to Rovaniemi, the capital of Finnish Lapland, due to some commercial matters). And he dresses like a Lappish. And that’s cool, isn’t it?
Talking about shopping, materialism and so on, I remember I tried to sell you that baking stone as a true tv-shop professional some weeks ago. So here you have another recipe using it. We must recoup the cost of it.
By the way, the quantities are for two calzone but you will have some meatballs leftovers for some “tapas”. I don’t know about you, but working for just 200 grs. of meatballs is quite annoying for me.
1. Place the meat with the spices and a bit of salt in a bowl. Chop ¼ of onion very finely and add it to the bowl. Then add the egg and the soft part of the bread (discard the crust) soaked with the milk and mix well. Cover with plastic and keep refrigerated for one hour so the flavours get well mixed.
2. Make medium sized meatballs and coat them with plain flour. Fry them in olive oil at medium heat and reserve in a pot.
3. Chop the onion into big pieces and fry lightly in the same oil we have cooked the meatballs. Add the chopped carrots and tomato. When ready, puree the onion, carrots and tomato all together with a pinch of salt (without the oil) using a hand blender. Pour this mix and the wine into the meatballs pot and stir couple times (carefully, so you don’t break the meatballs). Let it cook slowly for around 30 minutes.
4. Preheat the oven with the baking stone at 190 C.
5. Divide the dough into two pieces. Dust the working surface with semolina and roll one half of the dough out into a 30 cm round. Place some meatballs and sauce on a half of the dough, leaving 3 or 4 cm clean so you can close the calzone. Cover with mozzarella and a bit of fresh chopped parsley. Close the calzone (in this video Jamie Oliver shows how to do it). Repeat with the other half of the dough.
6. Bake the calzone for around 12 minutes or until golden brown.
Cuando algo se me mete entre ceja y ceja soy un horror, lo reconozco, pero llego a pensar que Herra K es aún peor, con lo cual he dado con la horma de mi zapato. En su obsesión por comer auténtica pizza en casa me ha arrastrado hacia una espiral de amasado y horneado compulsivo en busca de su pizza ideal: masa finita y con burbujas. Casi nada. No sé cómo tras años de ingesta desmesurada de precocinados (y cosas aún peores) puede mantener vivo ese paladar de puturrú de fuá.
El caso es que después de varios intentos creo que he dado con lo que buscábamos, una pizza con una masa ligera, que se cuece en el horno a alta temperatura unos minutos, nada exagerada en ingredientes que permiten que la masa se infle y haga burbujitas (o burbujones) y quede crujiente, crujiente…
Así que aquí comparto la experiencia con todos vosotros, para que aprendáis de nuestros errores, que no han sido pocos.
Aviso: requiere paciencia, tiempo e inversión económica.
Empezamos con la inversion económica que seguramente es lo que más pica. Ha sido doble:
1. Piedra para horno: no sé si es humanamente posible obtener la pizza con burbujas sin la piedra. Me daban los sudores de la muerte sólo de pensar en donde iba a meter la pedazo de piedra en la cocina de Pin y Pon, pero resulta que la piedra tiene como 1 ó 2 cm de espesor y la superficie es como una bandeja de horno más, así que se puede guardar fácilmente en el mismo sitio donde tengamos el resto de trastos. Suele venir con una pala de madera que es imprescindible para ejecutar la receta con éxito, porque si no a ver quien es el guapo que mete y saca la pizza del horno.
Nuestra piedra es ésta. Es estupenda, no puedo decir otra cosa. Eso sí, la pala no me hace mucha gracia, en mi opinión es bastante gruesa para su cometido, por lo que nos hemos ingeniado un remedio que más adelante os cuento.
2. “Pizza modo mio” de John Lanzafame. No tengo palabras de elogio suficientes para este libro. Tiene varias recetas de masas: la básica, una integral, otra dulce, una con parmesano, otra sin gluten… en fin, masas para no aburrirse y recetas estupendas, diferentes y muy originales. La parte de pizzas dulces es increíble.
He encontrado varios vídeos de este chef en internet. Concretamente éste de aquí abajo es el proceso para hacer la masa de la receta de pizza que os propongo, que en el libro aparece como masa básica. Como en el vídeo no explica cantidades y está en inglés, os pongo el proceso como viene en el libro, para que no perdáis detalle.
El resto de la receta es cosecha de la casa pero lo realmente importante del post es la masa. En el mundo de los ingredientes para pizzas hay pocas cosas prohibidas, así que lo mejor es que cada uno le eche imaginación y pruebe hasta encontrar su pizza perfecta.
Pizza “ortolana” acorde con los principios de Excuse me… es decir, sin champiñones
(Receta de la masa de John Lanzafame, extraída del libro “Pizza modo mio”)
Ingredientes:
160 grs. de harina de trigo
100 ml de agua templada
1 cucharadita de levadura seca instantánea
1 cucharadita de sal
1 cucharadita de azúcar
2 cucharaditas de aceite de oliva virgen extra y un poco más para engrasar
Sémola
2 cucharadas de salsa de tomate
½ bola de mozzarella de búfala
Un trocito de berenjena
Un trocito de cebolla
Un trocito de pimiento verde
Orégano
Opcional: unas rodajitas de salchichón casero
Modus operandi:
1. Mezcla el agua, la levadura, el azúcar y la sal en un cuenco pequeño. Añade poco a poco el aceite y deja la mezcla reposar en un sitio templado durante 10 minutos o hasta que burbujee.
2. Añade la harina y amasa alrededor de 15 minutos, hasta que la masa esté suave y elástica. Pinta el interior de un bol grande con aceite de oliva. Mete la masa en el bol, hazla rodar para que se impregne con el aceite y tápala con un paño limpio. Déjala levar durante 1- 1½ h. aproximadamente, o hasta que haya doblado su volumen.
3. Amasa un poquito para eliminar las burbujas que se hayan creado en el interior de la masa (en este momento, podemos envolver la masa con papel film y congelarla o refrigerarla durante 1 día. Para continuar con el proceso, deberás esperar a que recupere la temperature ambiente). Pon la masa en una bandeja de horno con papel vegetal, cúbrela de nuevo con un paño y déjala levar otros 15 minutos.
4. Mete la piedra en el horno y ponlo a precalentar a 250 C.
5. Espolvorea un poco de sémola en la superficie de trabajo y estira la masa hasta conseguir una base de 30 cm de diámetro. Añade la salsa de tomate (una rica, mejor casera), las verduras cortadas muy finitas (y el salchichón si lo vas a poner), la mozarrella desmenuzada con las manos y orégano al gusto.
6. Coloca la pizza sobre la piedra de hornear y déjala unos 5 minutos. Sácala, contempla tu obra, llora de la emoción y disfrútala antes de que se enfríe.
Peccato di cardinale.
Importante:
Las cantidades dan para una pizza grandecita o dos pequeñas. Yo suelo multiplicar los ingredientes de la masa por cuatro y hago 8 bolas individuales para congelar. Así cuando apetece pizza, no tengo más que sacar un par de bolas del congelador y retomar el proceso en el segundo levado. El tamaño de tu pizza dependerá del tamaño de tu pala, sin más.
Con la rasca que está empezando a hacer (¡y todavía no ponen la calefacción!) los tiempos de espera se alargan bastante, así que para la fermentación y el primer levado utilizo el horno precalentado a 40 C. El segundo levado sí lo hago sobre la bandeja fuera del horno, para ponerlo a precalentar y respetar los tiempos.
En otro video vi que él estira la masa con rodillo. A mí me ha dado mejor resultado comenzar con rodillo y terminar con las manos, pero eso ya a gusto del consumidor.
Respecto a la piedra hay que cuidar algunos detalles. Aunque parezca un “mostrenco” es muy delicada ella, y hay varios motivos por los que puede hacer “crack” sin previo aviso:
Si se mancha de salsa de tomate o queso, u otros ingredientes que aporten humedad. Por eso es importante dejar siempre el borde de la pizza limpio como una patena.
Si metemos la piedra con el horno precalentado. Hay que meterla siempre antes de poner el horno a precalentar, para que vaya cogiendo temperatura al mismo tiempo que el horno.
Si sacamos la piedra con el horno a 250 C. Hay que dejarla que se enfríe al mismo ritmo del horno.
Es importante saber que la piedra tarda más tiempo que el horno en coger temperatura, así que hay que dejarla precalentar unos 15-20 minutos más.
También que no se debe lavar la piedra con jabón. Sólo admite agua y estropajo, sin más aderezos.
La sémola es imprescindible. Si no usamos sémola la masa se agarra a la superficie y no podremos llevarla al horno. Una vez que hayamos cogido la pizza con la pala debemos moverla enérgicamente, si la pizza no se desliza la hemos liado. La única solución posible es cerrarla, convertirla en una calzone y llevarla al horno como buenamente podamos. Como os decía, nuestra pala es bastante gruesa y teníamos problemas para pasar la pizza de la mesa a la pala, así que ahora montamos la pizza directamente en ella. Sémola, ingredientes rápido y al horno.
La pizza ortolana tradicional no lleva ningún tipo de carne pero a mí me ha gustado ese punto distinto. Cambiar los champiñones por un riquísimo salchichón a la pimienta casero me ha sentado divinamente. Pero en este punto ya sabéis, libre albedrío, siempre contando con una salsa de tomate en condiciones y una mozzarella decente (y sin pasarse en cantidades, para que la masa tenga fuerza para hacer las burbujillas).
Ciao belli!
*****
I must confess that when I get a new idea I’m horrible, really stubborn, but I’m starting to think that Herra K is even worse, so in him I found what I was looking for. In his obsession to eat genuine pizza at home, he has dragged me to a spiral of compulsive kneading and baking to find his perfect pizza: thin dough and bubbly. What else. I don’t know how, after years of precooked food (and even worse things), he can keep that kind of super gourmet palate.
Well, after some attempts I think we’ve found what we were looking for: a pizza with light dough, baked at very high temperature, with not excessive ingredients that allow the dough to make those delicious bubbles, and crunchy, crunchy, crunchy…
Here I share my experience with all of you, so you can learn with our mistakes (not few, by the way).
Warning: it requires patience, time and economic investment.
Let’s start talking about the economic investment, what probably hurts the most. There have been two:
1. Pizza stone: I don’t know if it’s humanly possible to get a bubbly pizza without a stone. I was terrified with the idea of where to store that super big stone in my Lego kitchen. There is nothing to worry about. The stone is very very thin and it has the size of a normal baking tray, so you can easily store it where you have the rest of the trays. They usually sell the stone in company with a wooden spade, indispensable to cook your pizza successfully.
Our stone is this. It’s great, I can’t say anything negative about it. However, the spade is not very good, in my opinion it’s too thick for its purpose, so we had to find out a solution (I’ll show you at the end of the post).
2. “Pizza modo mio” by John Lanzafame. I have not enough praises for this book. It has several recipes of dough: basic, whole meal, sweet, parmesan, gluten free… great, different and creative recipes. The chapter “dessert pizzas” is simply amazing. You can’t get bored of this.
I’ve found some videos of this chef in internet. This one shows the process to make the pizza dough I’m talking about today, the basic one. In the video he doesn’t concrete the ingredients so I’ll write the recipe as in the book, so you won’t miss any detail.
The rest of the recipe is on my own, but the really important part of this post is the dough. In the world of pizza there are very few forbidden ingredients, so you better try with your own, let you imagination work and find your perfect pizza.
Pizza “ortolana”, according to the principles of Excuse me… - without mushrooms
(Recipe of the dough by John Lanzafame, from the book “Pizza modo mio”)
Ingredients:
160 g plain flour
100 ml warm water
1 tsp dried active yeast
1 tsp salt
1 tsp sugar
2 tsp olive oil, plus extra, for greasing
Semolina
2 tbsp tomato sauce
½ mozzarella di bufala ball
A little piece of eggplant
A little piece of onion
A little piece of green bell pepper
Oregano
Optional: some slices of salami
Modus operandi:
1. Put the yeast, salt, sugar and warm water in a small bowl and whisk until just combined. Gradually whisk in the olive oil, then leave in a warm place for 10 minutes, or until the mixture starts to bubble.
2. Add the flour and knead for 15 minutes, or until the dough is smooth and elastic. Rub the inside of a large bowl with olive oil. Roll the dough around in the bowl to coat it with oil, then place in the bowl, cover with a clean cloth and leave in a draught-free spot for 1-1½ hours, or until doubled in size.
3. Punch down the dough to expel the trapped air (at this stage, the dough can be covered in plastic wrap and refrigerated overnight or frozen. Bring back to room temperature before continuing). Place the dough on a baking tray lined with a baking paper, cover and leave in a draught-free spot for 15 minutes, or until risen by half again.
4. Place the pizza stone in the oven and preheat to 250 C.
5. Dust the working surface with semolina and roll the dough out into a 30 cm round. Add the tomato sauce (preferably homemade); the vegetables, thinly sliced (and the salami, if you are going to use it); the mozzarella, crumbled with your fingers, and some oregano.
6. Place the pizza on the stone and bake for 5 minutes. Take it away from the oven, contemplate your creation, cry of joy and enjoy before it cools down.
Peccato di cardinale.
Important:
The quantities above make a medium pizza or two smaller pizzas. I usually multiply the ingredients by 4 and I get 8 little dough balls to freeze. That way, when we want pizza, I only have to take couple of them out of the freezer and restart the process at the stage 3. The size of the pizza depends of the size of the spade, that’s it.
Considering the weather we are having these days (and they haven’t turned the heating on yet!), the time we have to leave the dough to prove gets much longer, so for the activation of the yeast and the first rise I use the oven, preheated at 40 C. However, I make the second one out of the oven, so I can start preheating it to bake the pizza.
In another video I saw him rolling the dough out with a rolling pin. I got my best results starting with the rolling pin and finishing with hands, but that something you have to try yourself.
About the stone, we have to consider some details. Even though it can look a bit monstrous, it’s quite delicate and there are several reasons why it might crack with no warning:
If it gets spots of tomato, cheese of other not-dry ingredients. That’s why it’s very important to leave the edges of the pizza free of ingredients.
If you place the stone in the oven once it’s already preheated. You must place it before you start preheating the oven, so the temperature of the stone rises little by little.
If you take the stone out of the oven at 250 C. You have to let it cool down inside the oven.
It’s important to know that the stone needs more time to preheat than the oven, around 15-20 minutes.
Also that you can’t wash it with any kind of soap. You can use just water and scourer, that’s it.
Semolina is indispensable. Otherwise, the dough gets stuck on the working surface and you can’t bring it to the oven. Once you have placed the pizza on the spade, you should shake it a little bit. If the pizza doesn’t slip, you have messed it up. The only solution is to close it, turn it into a calzone and bring it to oven somehow. As I told you before, our spade is quite thick and we had some problems to place the pizza on it, so nowadays we are preparing the pizza just on it. So semolina, quick ingredients and oven.
Traditional “pizza ortolana” has no meat at all, but I liked that different touch. Changing the mushrooms for some delicious homemade salami was a good decision for me. But about this, you know, free will, using always a good quality tomato sauce and some decent mozzarella (and not too much ingredients, so the dough can rise making those beautiful bubbles).


