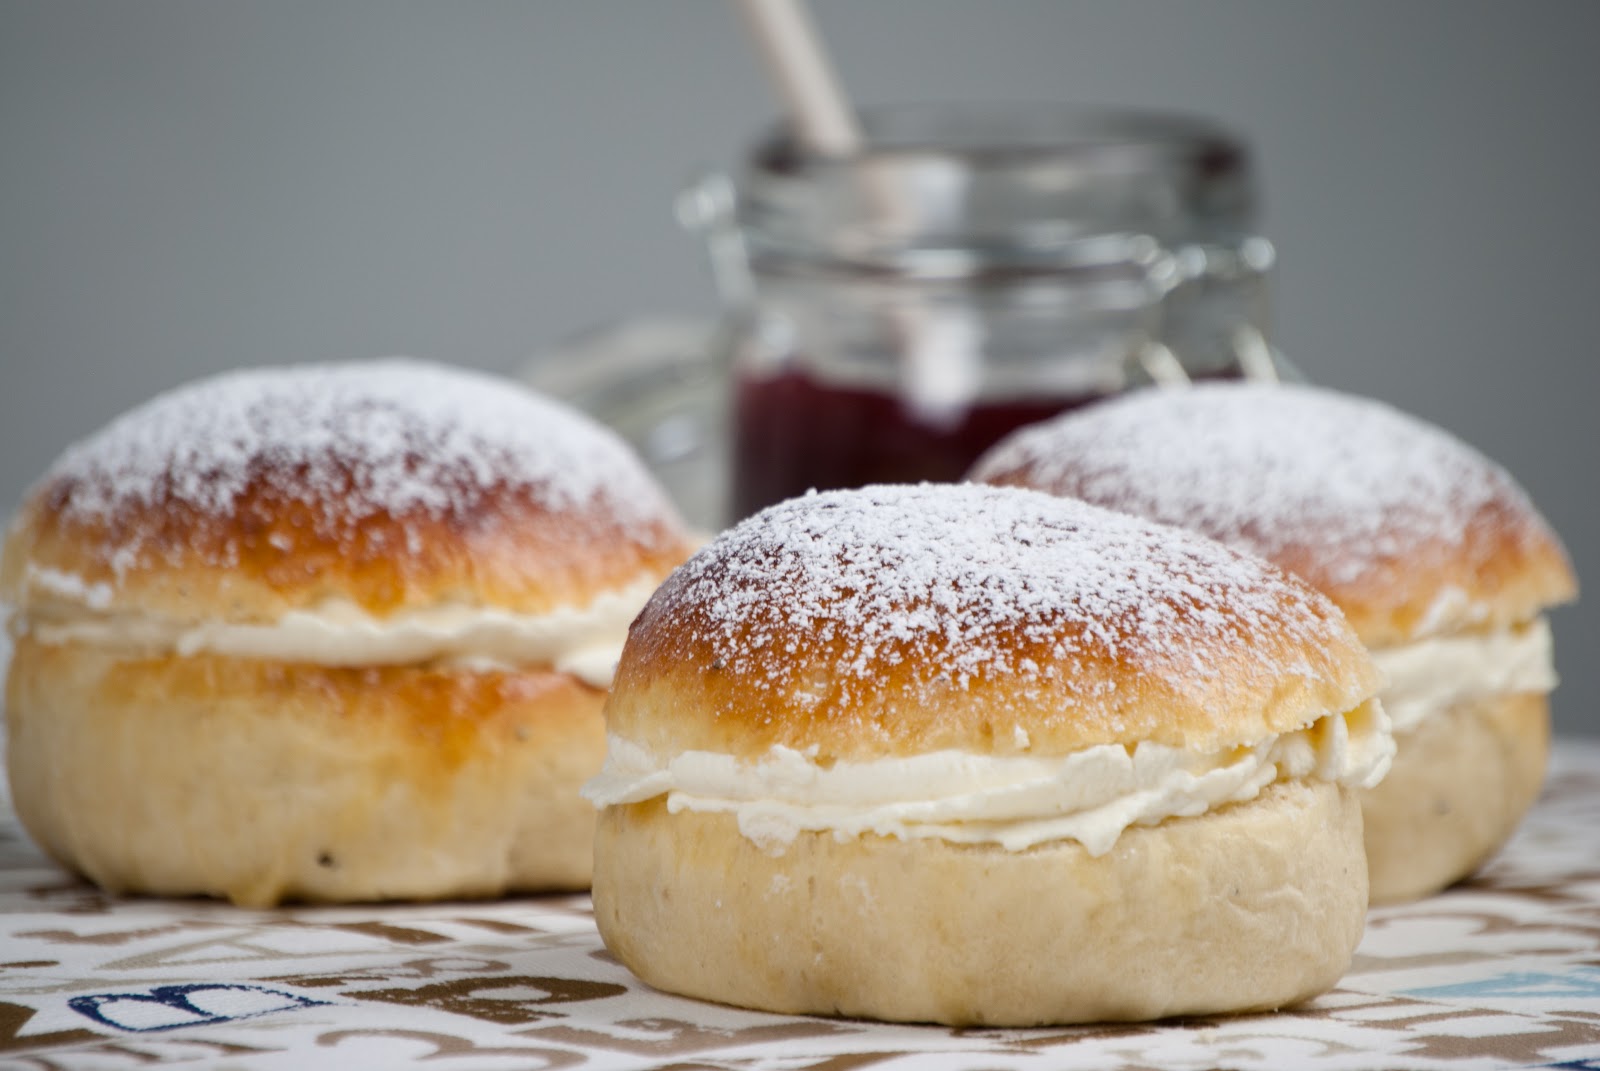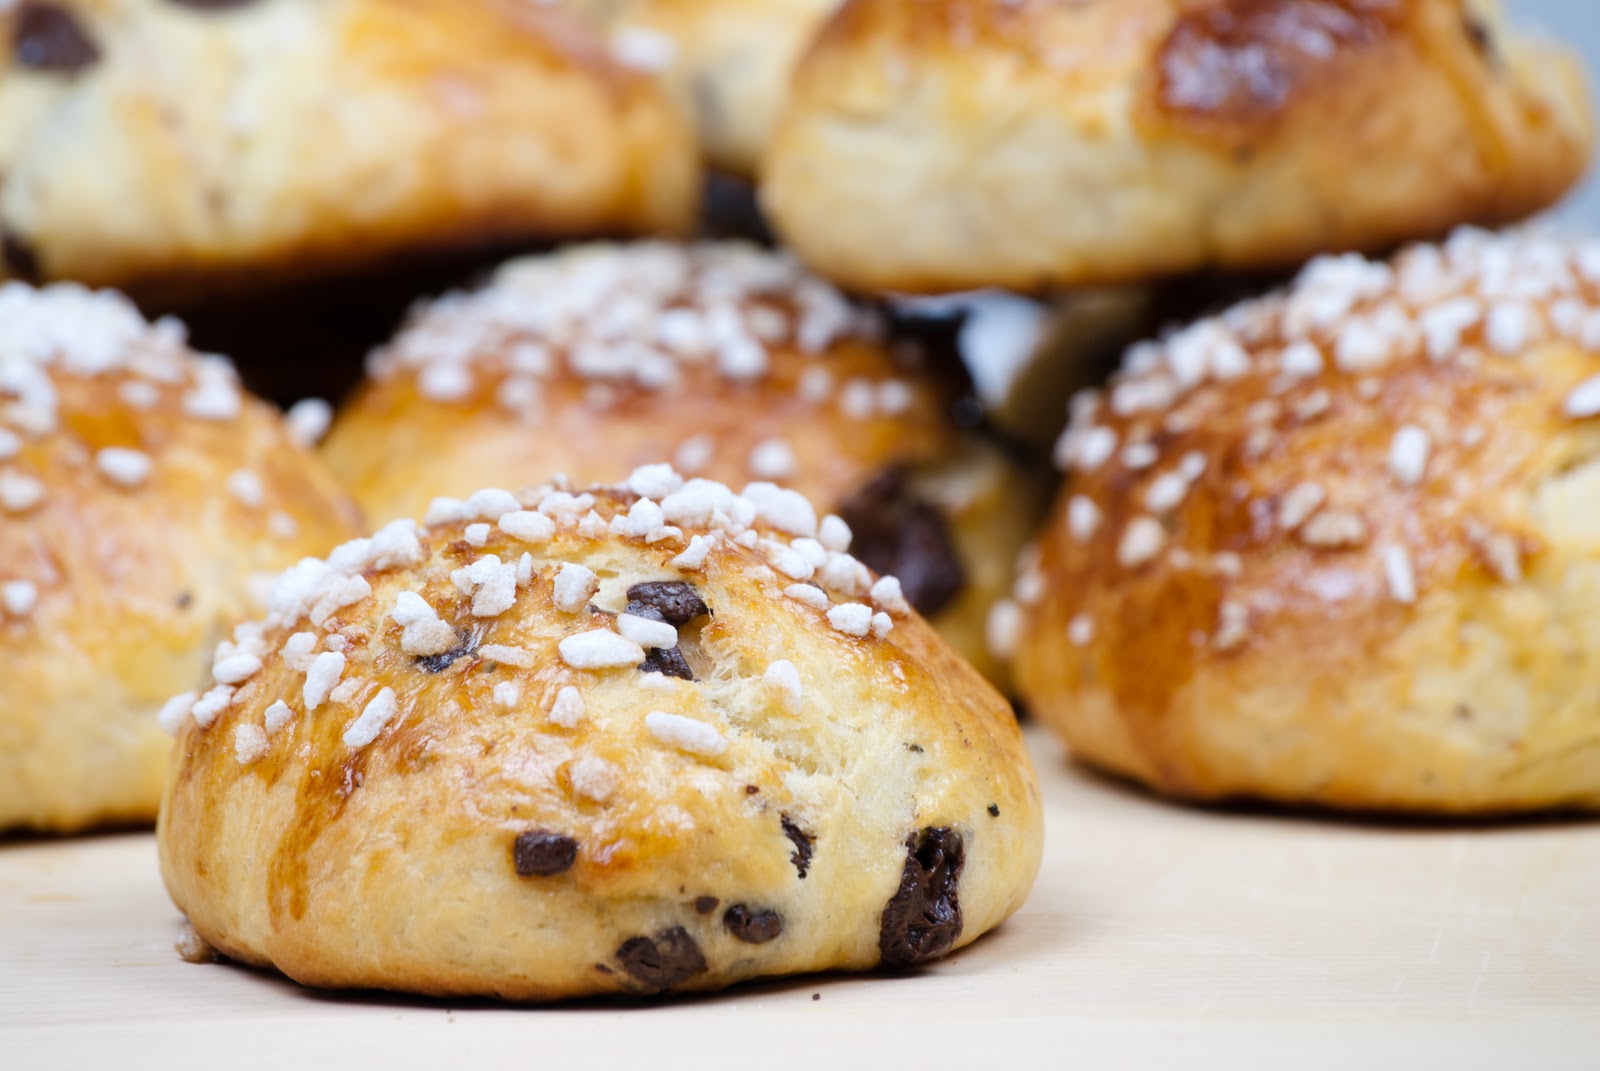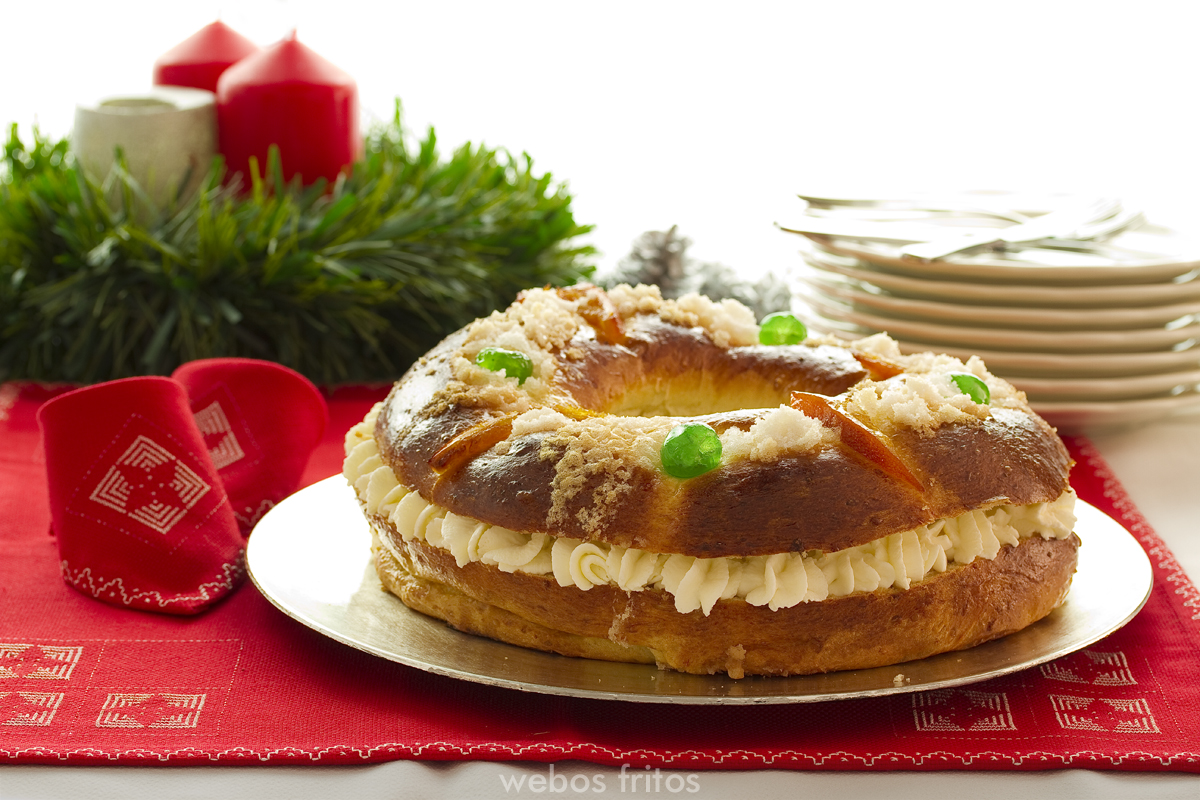
Showing posts with label pulla. Show all posts

02 January 2013

Feliz año nuevo o una buena forma de no aceptar el fin de las vacaciones (Magi's mini pullas)

(English version below)

¡Hola, hola! ¡Feliz año nuevo!

Ya estoy de vuelta de mis vacaciones en la madre patria y ahora me toca ponerme al día, volver a la rutina, hacer mi lista de propósitos (ya voy un poco tarde), mentalizarme, superar la depresión postvacacional y ponerme a dieta. Vamos, moco de pavo. Total, que he pensado en ese famoso dicho de “no dejes para mañana lo que puedas hacer pasado mañana” y yo voy a seguir con la fiesta. Porque si en España la navidad dura hasta el día 6, en mi casa, por muy lejos que esté, también.

No sé si los reyes magos van a tener tiempo de llegarse por estas tierras, a lo mejor han decidido que no merece la pena porque soy una desertora y para traerme carbón no les sale a cuenta el viaje, pero yo el 6 por la mañana voy a darme un homenaje. Y pondré mis zapatos por si acaso.

Para comenzar el año os traigo de nuevo cocina fusión hispano-finesa de la república independiente de mi casa. Una mezcla de pulla y roscón de reyes, para el día 6 o para cuando tercie, porque como no es ni una cosa ni la otra, la fecha puede no ser una excusa o el pretexto perfecto.

¿Hace? El año nuevo puede esperar hasta el día 7...

mini pulla de Reyes


Mini pullas de Reyes


Ingredientes (para 20 - 22 pullas):

440 grs de harina de trigo
2,5 dl de leche
120 grs de azúcar blanquilla
100 grs de mantequilla
1 huevo
1 sobre (11 grs) de levadura seca instantánea
2 cucharadas de agua de azahar
½ cucharadita de sal
Azúcar perla
Fruta escarchada

Para el relleno - trufa (opcional):


400 ml de nata para montar
3 cucharadas de azúcar glass
3 cucharadas de cacao puro en polvo


Modus operandi:

1. Bate el huevo. Mezcla la leche templada con la mitad del huevo batido (reserva la otra mitad para más tarde), el azúcar blanquilla, la sal y el agua de azahar.

2. Añade una parte de la harina con la levadura y mezcla bien. Agrega poco a poco la harina restante y la mantequilla en pomada y amasa hasta conseguir una masa suave y elástica. Cólocala en un bol grande y tápala con un paño. Déjala levar hasta que doble su tamaño.

3. Vuelve a amasar ligeramente para eliminar las burbujas que hayan aparecido durante el levado.

4. Haz 20 - 22 bolas con la masa y distribúyelas en dos bandejas de horno con papel vegetal. Tápalas con un paño y déjalas levar durante 30 minutos.

5. Precalienta el horno a 200 C.

6. Corta las frutas escarchadas en trozos pequeños. Pinta las pullas con el huevo reservado. Coloca unos trocitos de frutas escarchadas variadas y un poco de azúcar perla sobre cada pulla y hornea durante 10 minutos o hasta que estén doradas. Reserva.

7. Mezcla la nata con el azúcar glass y el cacao puro en polvo tamizado. Monta la mezcla con una batidora de varillas hasta que esté bien firme e introdúcela en una manga pastelera. Resérvala en el frigorífico hasta que las pullas se hayan enfriado completamente.

8. Abre las pullas realizando un corte a la mitad y rellénalas con la crema de trufa.


*Se puede cambiar el relleno por otro de tu elección (nata montada, crema pastelera...) o simplemente no rellenarlas. Es recomendable rellenar sólo las que se vayan a consumir en el momento, ya que las pullas se mantienen más tiernas fuera del frigorífico.


Hyvää ruokahalua!


*****
mini pulla de Reyes


Happy new year or a good way not to accept the end of the holidays


Hi there! Happy new year!

I'm back from my holidays in my homeland and now it's time to go back to real life, to retake the routine, to make my list of good intentions for the new year (I'm a bit late already, I know), to clear my mind, to go over the post-vacation blues and to start a diet. Ehh... pfff.  I've been thinking about that proverb “never put off till tomorrow what you can do... the day after tomorrow” (or something like that) and I've decided to continue with the party a little longer. If in Spain it lasts until January 6th, in my house, no matter how far away it is, it will do also.

I don't know if the Magi, Wise Men or Three Kings (the nice guys who bring the gifts in Spain on January 6th- Reyes Magos in Spanish) are gonna have time enough to come up here, maybe they think that because I'm a deserter I deserve nothing else but coal and it's not worth the trip, but I'll celebrate anyway and I'll leave my shoes ready, just in case they have some candy for me.

In the morning of January 6th Spaniards eat the famous roscón de Reyes for breakfast, and I've decided to make a mix of it and the Finnish pulla, and this is what I got. Fusion cuisine of the Independent Republic of my Home.

The new year can wait until January 7th...


Magi's mini pullas


Ingredients (makes 20 - 22 pullas):

440 g plain flour
2,5 dl milk
120 g caster sugar
100 g butter
1 egg
11 g easy-blend dried yeast
2 tbsp orange blossom water
½ tsp salt
Pearl sugar
Candied fruits

For the filling – chocolate cream (optional):

400 ml whipping cream
3 tbsp icing sugar
3 tbsp cacao powder


mini pulla de Reyes


Modus operandi:

1. Beat the egg. Mix the lukewarm milk with half of the beaten egg (we’ll use the other half later), caster sugar, salt and orange blossom water.

2. Mix some flour with the yeast and add it too. Mix well and gradually add the rest of the flour and the butter. Knead until the dough is no longer sticky. Place it in a big bowl, cover with a tea towel and leave to prove until it doubles its size.

3. Knead again for a while to remove the bubbles.

4. Divide the dough into 20 - 22 balls and place them in two baking trays prepared with baking paper. Cover them with a tea towel and leave to prove for 30 minutes.

5. Preheat the oven to 200 C.

6. Cut the candied fruits into small pieces. Paint the surface of the pullas with the remaining beaten egg. Decorate with some candied fruit pieces and sprinkle some pearl sugar on them. Bake for around 10 minutes or until golden brown. Reserve.

7. Mix the whipping cream with the icing sugar and the cacao powder, sifted. Whip this mix with an electric whisk into stiff peaks and place it in a piping bag. Reserve in the fridge while the pullas cool down. 

8. Open the pullas, cutting them in the middle and fill them with the chocolate cream.


*You can use other fillings of your choice (whipping cream, crème pâtissière...) or you can also not to fill them at all. It's a good idea to fill only those you are going to eat right away because the pullas are better preserved out of the fridge.


Hyvää ruokahalua!

23 October 2012

Artistilla invitada (Finnish pulla)


(English version below)

Me llena de orgullo y satisfacción escribir esta breve entrada para comentaros que la semana pasada estuve cocinando en el blog de las guindillas, una bitácora de la que me gusta todo: el estilazo de Capitán Rábano, las recetas sorprendentes de Tsatsiki Chef, los consejos del viejo... por gustarme, me gustan hasta los créditos (¡mucho!). Así que os invito a que os deis un paseíto por allí, veáis mi receta de pulla finlandesa y todas las demás (menos la del concurso de la super cesta de productos buenísimos para combatir el invierno finlandés... lo siento amigos, pero si alguien necesita esa cesta soy yo y NO QUIERO COMPETENCIA). 


Ahora en serio, me ha encantado aparecer como artistilla invitada (con peloteo deluxe incluído) en la casa de las guindillas, espero que me dejen repetir algún día. Así que si os gusta lo que veis en la imagen, pinchad aquí y preparáos para una tarde otoñal con aroma a cardamomo.

Una vez más... hyvää ruokahalua!

*****


Hi there!

This super brief post only has the purpose to announce my participation last week in a Spanish blog I love, ¡Con un par de guindillas!. They posted my Finnish pulla recipe so if you are curious about it, you can follow this link. I'm sorry this time it's only in Spanish, but you can always use a translator and if you are interested and the translator sucks like hell, you can email me and I'll help you with it.

Once more... hyvää ruokahalua!

17 May 2012

El lavavajillas que mece la cuna (orange blossom water pulla with candied oranges)


(English version below)

Dejadme empezar hoy con un consejo: si compartís piso con un psicópata no dejéis que ponga el lavavajillas.

Podría parecer mucho más sencillo atacar en mitad de la noche con el cuchillo jamonero u obligarte a meter tus deditos en el vaso de la batidora pero hay psicópatas y psicópatas. Y Herra K (que es psicópata y muchas otras cosas que terminan en “pata”) va mucho más allá de miedos básicos y recurrentes. Herra K coloca los cuchillos en el lavavajillas de manera que cuando lo abras para sacar los trastos te cortes sí o sí. Y claro la primera pasa, pero después de haberte cortado una vez, acordarte de su madre y de su padre (finlandeses ellos dos) y de haberle tatuado en la frente que los cuchillos no se colocan en el cestillo con la punta hacia arriba, la segunda vez huele. Y duele. Mucho. Porque señoras y señores, esta vez me he autoapuñalado en un brazo. Sí, sí, no ha sido el leve roce de la cuchilla con la piel, esta vez ha sido con la punta mirando hacia Cuenca.

Si lo que buscaba era no poner el lavavajillas nunca más lo ha conseguido. Pero se podía haber negociado (esta gente con tal de no abrir la boca...).

Y ya que estamos, otro consejo: cuando os autoapuñaléis id al médico a que os eche un pespunte. Mejor no os cuento por qué.

Cambiando de tema, recuerdo que cuando comencé mi andadura en este blog con la primera receta de pulla prometí hacer un ejercicio de cocina fusión bananera al que llamé en la euforia del momento “pulla arriquitaún”. El momento de cumplir mi promesa ha llegado, pero he decidido ponerle un nombre más... decente.

Al lío.


Pulla de agua de azahar con naranjas confitadas

Ingredientes (para 12 unidades):

Para la masa de pulla:

7 – 7,5 dl de harina de trigo
2,5 dl de leche
1 dl de azúcar blanquilla
100 grs de mantequilla
1 huevo
1 sobre (11 grs) de levadura seca instantánea
2 cucharadas de agua de azahar
½ cucharadita de sal
Azúcar perla

Para las naranjas confitadas:

1 naranja
50 ml de agua
4 cucharadas de azúcar blanquilla

Modus operandi:

1. Bate el huevo. Mezcla la leche templada con la mitad del huevo batido (reserva la otra mitad para más tarde), el azúcar blanquilla, la sal y el agua de azahar.

2. Añade una parte de la harina con la levadura y mezcla bien. Agrega poco a poco la harina restante y la mantequilla en pomada y amasa hasta conseguir una masa suave y elástica. Cólocala en un bol grande y tápala con un paño. Déjala levar unos 40 minutos.

3. Mientras tanto, lava la naranja y córtala en rodajas finas (puedes dejar las rodajas enteras o cortarlas por la mitad). Calienta a fuego alegre el agua y el azúcar para conseguir un almíbar fuerte. Cuando haya hervido un par de minutos, añade las rodajas de naranja y déjalas en el almíbar hirviendo durante 5 minutos. Sácalas del almíbar y colócalas sobre papel vegetal. Déjalas enfriar completamente.

4. Pasados los 40 minutos vuelve a amasar ligeramente para eliminar las burbujas que hayan aparecido durante el levado.

5. Haz 12 bolas con la masa y distribúyelas en una bandeja de horno con papel vegetal. Tápalas con un paño y déjalas levar durante 30 minutos.

6. Precalienta el horno a 200 C.

7. Pinta los bollos con el huevo reservado. Coloca una rodaja de naranja escarchada y un poco de azúcar perla sobre cada bollo y hornea durante 12 minutos o hasta que estén dorados.

*Es importarte vigilar que no se quemen las naranjas durante el horneado. Si ves que se empiezan a tostar, cubre los bollos con papel de aluminio.

**Para los detractores de las naranjas confitadas he horneado unas cuantas sustituyendo las naranjas por piñones. Nadie se ha quejado :P

*****


The dishwasher that rocks the cradle

Let me start today with a tip: if you share your flat with a psycho don't let him/her put the dishwasher.

It seems easier to attack in the middle of the night with the ham knife or obligate you to introduce your little fingers into the blender jar but there are different kinds of psychos. And Herra K (who is a psychopath and much other things that end in “path”) goes much more ahead of just basic and recurrent fears. Herra K puts the knifes in the dishwasher so you don't have a chance not to cut yourself when the program finishes and you take the dishes out. And at the first time it's ok, but after cutting yourself once and tattooing in his forehead that the tip of the knifes has to be always down, the second time it's at least a bit suspicious. And it hurts. A lot. Because, ladies and gentlemen, this time I have self-stabbed my arm. Yep, it hasn't been just a light touch of blade, this time it has been with the tip looking straight to my arm.

If he was looking not to put the dishwasher ever again he got it. But it could have been negotiated (these people do anything just not to open their mouths...).

And one more tip: when you stab yourself go to doctor to get some stitches. I'll better not tell you why.

Well, let's change to something nicer.

I remember when I started this blog with the first pulla recipe I promised to make an exercise of third-rate fusion cuisine that I named in the heat of the moment “pulla arriquitaún” (reference to some flamenco clichés). The moment has come but I've decided to give it a little bit more... decent name.

Let's go!


Orange blossom water pulla with candied oranges

Ingredients (makes 12):

For the pulla dough:

7 – 7,5 dl plain flour
2,5 dl milk
1 dl caster sugar
100 g butter
1 egg
11 g easy-blend dried yeast
2 tbsp orange blossom water
½ tsp salt
Pearl sugar

For the candied oranges:

1 orange
50 ml water
4 tbsp caster sugar

Modus operandi:

1. Beat the egg. Mix the lukewarm milk with half of the beaten egg (we’ll use the other half later), caster sugar, salt and orange blossom water.

2. Mix some flour with the yeast and add it too. Mix well and gradually add the rest of the flour and the butter. Knead until the dough is no longer sticky. Place it in a big bowl, cover with a tea towel and leave to prove for 40 minutes.

3. In the meanwhile, wash the orange and slice it finely (you can use the whole slice or cut them into half). Put the sugar and the water in a small saucepan and heat it up to get a strong syrup. When it has boiled for a couple minutes, add the orange slices and let them boil in the syrup for 5 minutes. Take them out of the syrup, place them on a baking paper and let them cool.

4. Knead again for a while to remove the bubbles.

5. Divide the dough in 12 balls and place them in a baking tray prepared with baking paper. Cover them with a tea towel and leave to prove for 30 minutes.

6. Preheat the oven to 200 C.

7. Paint the surface of the buns with the remaining beaten egg. Decorate with a slice of candied orange and sprinkle some pearl sugar on them. Bake for around 12 minutes or until they are golden brown.

*It's important not to burn the candied oranges in the oven. So take a look from time to time and if they look a bit toasted, cover them with aluminum foil.

**For those who don't like candied oranges I've baked some others with pine nuts instead. I got no complaints :P


21 February 2012

Otra de dulces típicos (laskiaispulla)

(English version below)

Ya os comenté en la entrada de los runebergintortut que rara es la fiesta en Finlandia que no se celebra poniéndose uno tibio con alguna cosa rica. Hoy es Laskiainen, una fiesta cristiana asociada a la Semana Santa que se celebra el martes anterior al Miércoles de Ceniza. Y no es que sea muy devota yo, pero cuando se trata de llenar la tripa no hay religiones que valgan.

Para celebrarlo, podemos ponernos morados de laskiaispullat (bollos de Laskiainen). La laskiaispulla es un bollo de cardamomo (vaya novedad, ¿no?) que se rellena con nata y mermelada de fresa o una crema-mazapán de almendras. Aquí os dejo mi versión con mermelada casera, pero por supuesto este paso lo podéis evitar con una visita al supermercado (no hay color, pero aceptamos barco). En Finlandia existe la costumbre de congelar fresas silvestres en verano para poder usarlas en pastelería en invierno así que la receta de hoy va con fresas congeladas, pero podéis sustituirlas por fresas frescas añadiendo un poco de agua.

Al lío laskiaispulliano.


Laskiaispulla

Ingredientes (para 12 laskiaispullat):

Para los bollos:

450 – 500 grs. de harina de trigo

250 ml de leche templada

100 grs. de mantequilla en pomada

100 grs. de azúcar blanquilla

25 grs. de levadura fresca

2 huevos

1 cucharadita de cardamomo

1 pizca de sal

Azúcar glass

Para la mermelada:

500 grs. de fresas congeladas (limpias)

250 grs. de azúcar blanquilla

El zumo de medio limón

Para la nata montada:

400 ml de nata para montar

2 cucharadas de azúcar blanquilla

1 cucharadita de esencia de vainilla

Modus operandi:

*Para la mermelada casera: pon las fresas congeladas en un bol y mételas en el microondas durante 3 minutos (sáltate este paso si utilizas fresas frescas). Añade el azúcar y el zumo de limón y tritúralo todo junto (puedes dejar algunos trocitos más enteros para que la mermelada tenga otra textura). Pon la mezcla a fuego medio en una olla pequeña durante 1 hora. Deja enfriar mientras preparas los bollos.

1. Vierte la leche en un bol y añade la levadura, desmenuzándola con las manos. Agita con unas varillas hasta que la levadura se haya disuelto en la leche. Añade el azúcar, la sal, el cardamomo y un huevo. Remueve de nuevo para que se integren bien los ingredientes.

2. Añade la mitad de la harina, mezcla con ayuda de una espátula y agrega la mantequilla cortada en subitos. Mezcla bien hasta que la mantequilla se haya integrado completamente en la masa; entonces añade el resto de la harina y amasa hasta conseguir una masa suave y elástica. Coloca la masa en un bol y déjala levar tapada con un paño durante 1 hora o hasta que doble su volumen.

3. Elimina las burbujas de aire que se hayan formado en el interior con un ligero amasado. Haz 12 bolas con la masa y distribúyelas en una bandeja de horno con papel vegetal. Tápalas con un paño y déjalas levar durante 30 minutos.

4. Precalienta el horno a 200 C.

5. Bate el otro huevo y pinta con él los bollos (en este momento puedes añadir algunas almendras fileteadas). Hornea a 200 C durante 12 minutos. Deja enfriar los bollos sobre una rejilla.

6. Monta la nata con el azúcar y la esencia de vainilla ayudándote de una batidora de varillas. Coloca la nata montada en una manga pastelera.

7. Corta la parte superior de los bollos. Unta el interior con mermelada de fresa y dibuja un aro alrededor con nata montada. Cierra los bollos y decora con azúcar glass.

Hyvää ruokahalua!

*****


One more typical bun

I already told you in the post of runebergintortut that usually public holidays in Finland are somehow connected with some sweet product. Today is Laskiainen (Shrove Tuesday), a Christian celebration related to Easter, and I’m not believer but if we are talking about filling my belly with good stuff, then let’s celebrate!

These days you can eat a lot of laskiaispullat (Laskiainen buns). Laskiaispulla is a cardamom bun (what a surprise, huh?) filled with whipped cream and strawberry jam or almond marzipan cream. Here you have my version with homemade jam but of course you can skip this step with a quick visit to supermarket (it’s not the same, but good anyway). In Finland, people usually freeze fresh wild strawberries in summer, so they can use them for baking in winter. That’s why this recipe is made with frozen strawberries, but you can change them for fresh ones just adding a bit of water.

Let’s go!

Laskiaispulla

Ingredients (makes 12):

For the buns:

450 – 500 g plain flour

250 ml lukewarm milk

100 g butter, softened

100 g caster sugar

25 g fresh yeast

2 eggs

1 tsp cardamom

1 pinch of salt

Icing sugar

For the jam:

500 g clean frozen strawberries

250 g caster sugar

The juice of half a lemon

For the whipped cream:

400 ml heavy cream

2 tbsp caster sugar

1 tsp vanilla essence

Modus operandi:

*For the homemade jam: place the frozen strawberries in a bowl and heat them in the microwave for 3 minutes (skip this step if you are using fresh strawberries). Add the sugar and the lemon juice and blend everything together (you can leave some bigger pieces of fruit so the jam has a different texture). Pour the mixture into a little pot and cook at medium heat for 1 hour. Let it cool down while you bake the buns.

1. Pour the milk into a bowl and add the yeast, crumbling it with your hands. Whisk until the yeast is dissolved in the milk. Add the sugar, salt, cardamom and one egg. Whisk again so the ingredients get well mixed.

2. Add half of the flour, mix with a spatula and add the butter, diced. Mix until the butter has completely blended with the dough; then add the rest of the flour and knead to get a smooth and elastic dough. Place it in a bowl, cover with a tea towel and leave to prove for 1 hour, or until it doubles its size.

3. Knead a little bit to remove the air bubbles inside the dough. Divide the dough in 12 balls and place them on a baking tray prepared with baking paper. Cover them with a tea towel and leave to prove for 30 minutes.

4. Preheat the oven to 200 C.

5. Whisk the other egg and paint the buns with it (in this step you can also add some almond flakes). Bake at 200 C for 12 minutes. Let the buns cool down on a wire rack.

6. Whip the cream with the sugar and the vanilla essence, using an electric mixer. Place the whipped cream in a piping bag.

7. Cut the upper part of the buns. Spread some strawberry jam inside and draw a ring around with whipping cream. Close the buns and decorate with icing sugar.

Hyvää ruokahalua!

17 November 2011

Nieve (chocolate pulla)

(English version below)


Para el domingo está pronosticada la primera nevada de este otoño-invierno. Yo tengo pensado recibirla con unas manoplas laponas y un par de pullas (pul-las) de chocolate.

Como ya os comenté en el post de los korvapuusti, la pulla es una masa básica en la repostería finlandesa. Sirve para preparar los rollitos de canela, el bostonkakku y la voisilmäpulla (pulla de ojo de mantequilla). Tiene un sabor pronunciado a cardamomo, que yo asocio con el invierno y la nieve... será porque lo descubrí aquí, o porque es un gustazo salir de la sauna en invierno y comerte un par de ellas recién hechas con un té bien caliente. Ese es mi plan para hoy.

Cuando mi familia estuvo aquí este verano, probaron las pullas y los korvapuustis con las consecuencias normales que acarrean estos dulces: sobredosis. “Alguien” concretamente las acompañaba siempre con una onza de chocolate negro y pensé que no estaría mal ponérselo aún más fácil.

Para ti va esta receta.

P.d.: si os pensáis que me vais a explotar estas navidades horno mediante, vais listos :D


Pulla de chocolate

Ingredientes (para 12 pullas):

7 – 7,5 dl. de harina de trigo

2,5 dl. de leche

1 dl. de azúcar

100 grs. de mantequilla

1 huevo

1 sobre (11 grs.) de levadura seca instantánea

½ cucharada de cardamomo molido

½ cucharadita de sal

100 grs. de chocolate negro 70%

Azúcar cande o perla

Modus operandi:

1. Bate el huevo. Mezcla la leche templada con la mitad del huevo batido (reserva la otra mitad para más tarde), el azúcar, la sal y el cardamomo.

2. Añade una parte de la harina con la levadura y mezcla bien. Agrega poco a poco la harina restante y la mantequilla en pomada y amasa hasta conseguir una masa suave y elástica. Colócala en un bol grande y tápala con un paño. Déjala levar unos 40 minutos.

3. Trocea el chocolate a tu gusto. Amasa ligeramente la masa (valga la redundancia) tras el levado y añade el chocolate haciendo pliegues. No amases demasiado, sólo lo necesario para que el chocolate quede integrado. Haz 12 bolas y déjalas levar otros 30 minutos en una bandeja con papel vegetal, cubiertas con un paño.

4. Precalienta el horno a 225 C.

5. Pinta la superficie de los bollitos con el huevo batido que teníamos reservado y espolvorea con azúcar perla.

6. Hornea durante unos 12 – 15 minutos o hasta que estén bastante dorados.

Hyvää ruokahalua!

*****


They have forecasted the first snow of this autumn-winter for next Sunday. I’m planning to welcome it with a pair of Lappish mittens and couple chocolate pullas.

As I told you in the post of korvapuusti, pulla is a basic dough in Finnish bakery. It’s the base for cinnamon buns, bostonkakku and voisilmäpulla (butter eye bun). It has a deep cardamom flavour that I connect with winter and snow… maybe it’s because I discovered it here or because it’s a pleasure to leave sauna in winter and eat a pair of just baked pullas with a very hot tea. That’s my plan for today.

When my family was here last summer, they tried pullas and korvapuustis with the normal consequences these cute buns carry: overdose. “Someone” used to eat them always with a little piece of dark chocolate. I thought it couldn’t be a bad idea to make it easier for him.

This recipe is for you.

P.s.: don’t even think about exploiting me on Christmas with an oven… :D

Chocolate pulla

Ingredients (makes 12):

7 – 7,5 dl. plain flour

2,5 dl. lukewarm milk

1 dl. caster sugar

100 g. butter

1 egg

11 g. easy-blend dried yeast

½ tbsp. cardamom

½ tsp. salt

100 g dark chocolate 70%

Pearl sugar

Modus operandi:

1. Beat the egg. Mix the milk with half of the beaten egg (we’ll use the other half later), sugar, salt and cardamom.

2. Mix some flour with the yeast and add it too. Mix well and gradually add the rest of the flour and the butter. Knead until the dough is no longer sticky. Place it in a big bowl, cover with a tea towel and leave to prove for 40 minutes.

3. Chop the chocolate as you like. Knead again for a little while and add the chocolate folding the dough. Don’t knead too much, just until the chocolate is evenly distributed. Make 12 balls and leave them to prove for 30 minutes on a baking tray with non-stick baking paper, covered with a tea towel.

4. Preheat the oven to 225 C.

5. Paint the surface of the buns with the remaining beaten egg and sprinkle with pearl sugar.

6. Bake for around 12-15 minutes or until golden brown.

Hyvää ruokahalua!

30 August 2011

Empezamos con 2 x 1! (Korvapuusti and Boston cake)

(English version below)

Estamos que lo tiramos (os preguntaréis cómo voy a traducir esto al inglés… sí, yo también me lo pregunto). Hoy, para celebrar que ésta es mi primera entrada formal, os voy a descubrir el secreto de la repostería finlandesa (hallazgo producto del mes y medio ocioso que llevo por aquí): la masa de pulla (léase pul-la, por favor) y dos recetas típicas que podemos hacer con ella.

El korvapuusti es el bollo de canela finés, muy parecido en el sabor al resto de bollos de canela nórdicos, pero con forma diferente. El Boston cake es un pastel hecho de rollos de canela, es decir, el éxtasis del buen amante del korvapuusti. He visto y comprobado de primera mano que ambos productos son altamente adictivos. Vamos, como el glutamato monosódico pero sin controversias.

Avisados quedáis.

Bostonkakku (Boston cake)


Ingredientes para la masa de pulla (cantidades para 1 Boston cake o 12 korvapuusti):

7 – 7,5 dl. de harina de trigo

2,5 dl. de leche

1 dl. de azúcar

100 grs. de mantequilla

1 huevo

1 sobre (11 grs.) de levadura seca instantánea

½ cucharada de cardamomo molido

½ cucharadita de sal


Ingredientes extra para los korvapuusti:

50 grs. de mantequilla

Azúcar blanquilla

Canela

Azúcar perla o cande


Ingredientes extra para el Boston cake:

50 grs. de mantequilla

Azúcar blanquilla

Canela

Azúcar perla o cande

Almendra en granillo o laminada (opcional)

Glasa blanca (glaseado real) (opcional)

Korvapuusti (con unos problemitas técnicos con la luz...)


Modus operandi (masa básica de pulla):

1. Bate el huevo. Mezcla la leche templada con la mitad del huevo batido (reserva la otra mitad para más tarde), el azúcar, la sal y el cardamomo.

2. Añade una parte de la harina con la levadura y mezcla bien. Agrega poco a poco la harina restante y la mantequilla en pomada y amasa hasta conseguir una masa suave y elástica. Colócala en un bol grande y tápala con un paño. Déjala levar unos 40 minutos.

3. Pasado este tiempo vuelve a amasar ligeramente para eliminar las burbujas que hayan aparecido durante el levado.

Opción A: Korvapuusti.

4. Estira la masa en un rectángulo de 30 x 60 cm. Unta la masa con la mantequilla en pomada y espolvorea generosamente con azúcar y canela. 

5. Enrolla la masa a lo largo y córtala en trapecios de 5 cm por el lado más ancho y 2 cm por el más estrecho. Coloca cada pieza por el lado más ancho sobre una bandeja de horno con papel vegetal. Presiona con los dos pulgares cada pieza hasta que se hunda la parte central, y aparezcan dos especie de caracolas en los laterales.

6. Tapa la bandeja con un paño y dejar levar los bollitos unos 30 minutos.

7. Pasado este tiempo, pinta la superficie de los bollitos con el huevo batido que teníamos reservado y espolvorea con azúcar perla.

8. Hornea a 225 C unos 12 minutos o hasta que estén bastante dorados.

Opción B: Boston cake.

4. Estira la masa en un rectángulo de 30 x 60 cm. Unta la masa con la mantequilla en pomada y espolvorea generosamente con azúcar y canela. 

5. Enrolla la masa a lo largo y córtala en piezas iguales de unos 4 cm. Deben quedar unas caracolas pequeñitas que colocaremos en un molde redondo previamente enmantequillado, dejando bastante espacio entre ellas. 

6. Tapa el molde con un paño y deja levar unos 30 minutos.

7. Pasado este tiempo, pinta la superficie del pastel con el huevo batido que teníamos reservado y espolvorea con azúcar perla. Decora con almendras laminadas o en granillo (opcional).

8. Hornea unos 25 – 30 minutos a 200 C.

9. Después del horneado, deja enfriar el pastel unos minutos y desmóldalo sobre una rejilla. Decora la superficie con glasa blanca (opcional).

Estas son dos propuestas para esta masa, pero hay infinidad de opciones. Dos también muy conocidas son la pulla a secas (se cogen porciones de masa, se les da forma de bola, se pintan con huevo, se espolvorean con azúcar perla y se hornean) y la voisilmäpulla a.k.a. pulla de ojo de mantequilla (también con forma de bola pero con un agujero en medio que se rellena de mantequilla, mi pequeño saltamontes).

Para otro día dejo la pulla Sevilla o arriquitaún, os vais a enterar de lo que es cocina fusión…

*****

We start with 2 x 1 (read 1, bake 2)! Today, as a celebration of my first real post, I’m going to introduce you to the secret of finnish baking: the pulla dough, the base of many finnish buns. I’ll give you also two examples of what we can do with it.

Korvapuusti is the typical cinnamon bun from Finland, very similar to the rest of cinnamon buns in other Nordic countries, but with a very different and special shape. The Boston cake is made by cinnamon buns, like a giant korvapuusti, the ecstasy of a cinnamon bun lover. I could check myself that both of these baking products are highly addictive. Like monosodium glutamate but without controversy.

You’ve been warned. 


Ingredients for the pulla dough (makes 1 Boston cake or 12 korvapuusti):

7 – 7,5 dl. plain flour

2,5 dl. lukewarm milk

1 dl. caster sugar

100 g. butter

1 egg

11 g. easy-blend dried yeast

½ tbsp. cardamom

½ tsp. salt


More ingredients for korvapuusti:

50 g. butter

Caster sugar

Cinnamon

Pearl sugar


More ingredients for Boston cake:

50 g. butter

Caster sugar

Cinnamon

Pearl sugar

Sliced almonds or almond sprinkles (optional)

Royal icing (optional)

Korvapuusti (my apologies about the lighting...)


Modus operandi (basic pulla dough):


1. Beat the egg. Mix the milk with half of the beaten egg (we’ll use the other half later), sugar, salt and cardamom.

2. Mix some flour with the yeast and add it too. Mix well and gradually add the rest of the flour and the butter. Knead until the dough is no longer sticky. Place it in a big bowl, cover with a tea towel and leave to prove for 40 minutes.

3. Then knead again to remove the bubbles.


Option A: Korvapuusti.


4. Roll the dough out using a rolling pin until it’s 30 x 60 cm. Spread the butter on the dough and generously sprinkle caster sugar and cinnamon. 

5. Roll the dough up from the long side. Cut it into 5 x 2 cm trapeziums. Place each bun on a baking tray prepared with baking paper, with the 5 cm edge sitting on it. Press with both thumbs on top of the bun, so the central part goes down and two little rolls appear on the sides. 

6. Cover the tray with a tea towel and leave to prove for 30 minutes.

7. Paint the surface of the buns with the remaining beaten egg and sprinkle with pearl sugar.

8. Bake at 225 C for around 12 minutes or until golden brown.

Option B: Boston cake.


4. Roll the dough out using a rolling pin until it’s 30 x 60 cm. Spread the butter on the dough and generously sprinkle caster sugar and cinnamon. 

5. Roll the dough up from the long side. Cut it into 4 cm pieces. You will get little cinnamon rolls. Place them in a prepared baking tin, leaving a little free space between the buns.

6. Cover the tin with a tea towel and leave to prove for 30 minutes.

7. Paint the surface of the cake with the remaining beaten egg and sprinkle with pearl sugar. Decorate with sliced almonds or almond sprinkles (optional).

8. Bake at 200 C for 25 – 30 minutes.

9. Leave the cake to cool for a while and remove from the tin. Place it on a wire rack and decorate with royal icing (optional).

These are two examples of what you can bake using pulla dough. Other two very well know options are the pulla itself (take pieces of the dough and give them ball shape, paint with beaten egg, sprinkle some pearl sugar and bake) and the voisilmäpulla, or butter eye bun (also ball shaped but with a hole in the middle filled with butter).

Other day we’ll see the Pulla Sevilla, or arriquitaún, you’ll see what fusion cuisine is… :P
Related Posts Plugin for WordPress, Blogger...