Showing posts with label chocolate. Show all posts

06 March 2013

Amigos invisibles que saben lo que hacen (Ladurée's tarte tout chocolat)

(English version below)

Me imagino que os estaréis preguntando qué es esto de amigos invisibles en el mes de marzo... tenía que haberme puesto con las manos en la masa después de nochebuena pero tengo que reconocer que tenía miedito. Os pongo en antecedentes:

Mi familia por parte de madre es así un poco, como decirlo... multitudinaria. Después de décadas volviéndonos locos buscando regalos para todos, las navidades pasadas por fin llegó el amigo invisible (grandísima idea cuando tu madre tiene 6 hermanos con sus parejas y correspondiente prole). Papelitos para todos. Abro mi papelito y... ¡tachán! Mi hermano. De veintipico me tenía que tocar mi hermano, con lo cual deduje que es una persona con mucha suerte.

Llegó el momento de la verdad, nos dimos los regalitos y resultó que mi amigo invisible era... mi hermano. Supongo que no volverá a repetirse una coincidencia así en otras cuantas décadas, pero el caso es que estuvo muy muy bien. Se ve que ha desarrollado un paladar gourmet y me regaló con muchísimo acierto Sucré de Ladurée


Ladurée's Sucré


Vale, lo tenía en mi lista de Amazon.

Si alguien de mi familia está leyendo esta entrada, le recomiendo que cierre el navegador o su ordenador de autodestruirá en 3...

2...

1...

Vaaaaaale... se lo pedí yo.

El caso es que él me lo regaló con mucho amor y más pasta y me hizo muy feliz. Además se encargó de hojearlo y decirme: “Tienes que hacer esta tarta”. Si normalmente sus deseos son órdenes para mí, esta vez con mucho más motivo, así que le prometí que la primera receta que hiciera sería esa. Y claro, cuando la leí paso por paso me dió un no-sé-qué-qué-sé-yo que siempre que me iba a poner al lío me decía “mañana”.

Pero aquí está, y aunque es una tarta bastante laboriosa os aseguro que no es tan fiero el león como lo pintan. Y es de Ladurée. Y está buenísima. Pero buenísima no de... “mira qué buena esta tarta”, no, buenísima de tocar el nirvana con los dedos llenos de chocolate.

Paula, estás invitada a merendar.


Tarte tout chocolat

Tarta tout chocolat de Ladurée


Ingredientes:

Para la base:

200 grs de harina de trigo (y un poco más para espolvorear)
120 grs de mantequilla, muy fría (y un poco más para engrasar)
75 grs de azúcar glass
25 grs de almendas molidas
12 grs de cacao en polvo sin azúcar
1 pizca de flor de sal
1 huevo

Para el bizcocho:

45 grs de chocolate (60 – 70%)
3 huevos
65 grs de azúcar blanquilla

Para la ganache de chocolate:

300 grs de chocolate (65% - 75%)
300 ml de nata para montar
100 grs de mantequilla a temperatura ambiente

Para decorar:

1 tableta de chocolate
Cacao en polvo


Modus operandi:

Base:

1. Tamiza la harina en un cuenco grande. Añade la mantequilla cortada en daditos junto con el azúcar glass, las almendras, el cacao y una pizca de flor de sal. Trabaja los ingredientes con las palmas de las manos hasta conseguir una textura arenosa. Añade el huevo y mezcla (sólo hasta que los ingredientes estén integrados, no hay que pasarse de amasado). Haz una bola con la masa, envuélvela en film y ponla a enfriar en la nevera durante al menos 1 hora (mejor de un día para otro).

2. Engrasa y enharina un molde de tarta de 24 cm de diámetro. Enharina la superficie de trabajo y estira la masa hasta que tenga un grosor de 2 mm. Colócala en el molde y déjala enfriar en la nevera durante 1 hora.

3. Precalienta el horno a 170 C.

4. Pincha la masa con un tenedor para que no suba. Coloca un círculo de papel vegetal sobre la masa y cúbrelo con garbanzos o pesos. Hornea durante 25 minutos. Retira los pesos y el papel y deja la base enfriar completamente.

Bizcocho:

5. Funde el chocolate al baño maría. Separa las yemas de las claras. En un cuenco grande, mezcla las yemas con 35 grs de azúcar hasta que espumen. Por otro lado, monta las claras hasta que espumen, entonces añade el resto del azúcar y sigue montando hasta que estén bien firmes. Añade ¼ de las claras al cuenco de las yemas. Vierte el chocolate y agrega el resto de las claras. Mezcla con movimientos envolventes.

6. Precalienta el horno a 170 C.

7. Coloca la mezcla en una manga pastelera con una boquilla lisa. En una bandeja preparada con papel vegetal, dibuja un disco de masa de 2 cm de diámetro menos que la base. Hornea durante 15 minutos y deja el bizcocho enfriar sobre una rejilla.

Ganache de chocolate:

8. Corta el chocolate finamente y disponlo en un cuenco grande. Calienta la nata en un cazo hasta que hierva. Vierte la mitad de la nata sobre el chocolate y mezcla con unas varillas. Añade el resto de la nata y vuelve a mezclar. Corta la mantequilla y añádela a la ganache. Remueve con una espátula hasta que la mezcla esté suave.

Montaje:

9. Vierte una capa fina (2-3 mm) de ganache sobre la base. Coloca encima el disco de bizcocho y presiona ligeramente. Añade gañache hasta cubrir toda la tarta y déjala reposar durante media hora.

10. Decora la tarta con láminas de chocolate (araña los laterales de la tableta de chocolate con el lomo de la hoja de un cuchillo – la parte que no corta – para conseguir láminas finas), cortándolas directamente sobre la tarta. Espolvorea ligeramente con cacao en polvo.

Bon appétit!


*****
Tarte tout chocolat


A very smart secret Santa


I guess you might be wondering what is this secret Santa stupidity in march... yep, I should have done this before, right after Christmas, but I have to admit that I was a bit scared. Let's start from the beginning:

My family on my mother's side is quite... how could I say it... massive. After decades going crazy looking for gifts for everybody, last Christmas we finally played the secret Santa game (a great idea when your mother has 6 siblings – and they have husbands/wives and kids). Papers for everybody. I opened my paper and... voilá! My brother. 20 something papers in the basket and I got my brother (in that moment I thought how lucky he was).

The moment of the truth came, we got our gifts and it happened that my secret Santa was... my brother. I suppose that a coincidence like that won't be repeated in a bunch of decades more but it was nice. Very nice. It seems my brother has become a gourmet or something like that and he bought a great book for me: Ladurée's Sucré.

Ok, it was in my Amazon wish list.

If anyone from my family is reading this post, you should close the window right away or your computer will self-destruct in 3...

2...

1...

Ok, ok. I asked it myself.

The point is that he bought it for me with a lot of love and more money. He even checked it and told me: “you have to make this pie”. And as I can never say “no” to him (and even less this time), I promised him that it would be the first recipe I would make from the book. Yep, I did. But then I read it and I don't know what happened, but every time I was going to start baking it I thought: “tomorrow”.

But here it is and even though it's quite laborious I promise it's not as hard as it looks. And it's Ladurée's. And it's luscious. But not like... “hey, this is delicious”, it's more like touching nirvana with your fingers dipped in chocolate.

Paula, you can take your piece.


Ladurée's Tarte tout chocolat


Ingredients:

For the tart dough:

200 g plain flour (and some more to dust)
120 g butter, very cold (and some more to grease the pan)
75 g icing sugar
25 g ground almonds
12 g unsweetened cocoa podwer
1 pinch of fleur de sel
1 egg

For the sponge cake:

45 g chocolate (60 – 70%)
3 eggs
65 g caster sugar

For the chocolate ganache:

300 g chocolate (65% - 75%)
300 ml whipping cream
100 g butter, at room temperature

For the decoration:

1 chocolate bar
Cocoa powder


Modus operandi:

Tart dough:

1. Shift the flour into a large bowl. Add the butter, cut into small dices, the icing sugar, the almonds, the cacao and a pinch of fleur de sel. Using the palm of your hands, work the ingredients together until they resemble fine grain. Then add the egg and combine just until homogeneous (don't overwork). Form the dough into a ball and wrap it. Refrigerate for a minimum of 1 hour (better overnight).

2. Butter and flour a 24 cm tart pan. Dust the working surface with flour, roll the dough out to 2 mm thick and gently press it into the pan. Allow to rest in the refrigerator for 1 hour.

3. Preheat the oven to 170 C.

4. Prick the surface of the dough with a fork. Fit a round piece of baking paper over the dough and place dried beans or weights on top. Bake for 25 minutes. Remove the weights and the baking paper. Allow to cool.

Sponge cake:

5. Melt the chocolate in a heatproof bowl set over a pan of simmering water. Separate the egg whites and the yolks. In a large bowl, mix the yolks with 35 g of sugar and beat until frothy. In another bowl, whip the whites until frothy, add the rest of the sugar and continue whipping until firm. Pour ¼ of the whites into the yolks mixture. Fold in the chocolate and add the remaining whites. Combine gently.

6. Preheat the oven a 170 C.

7. Line a baking sheet with baking paper and transfer the chocolate batter to a piping bag fitted with a plain tip. Pipe a disk of batter 2 cm smaller than that of the shell. Bake for 15 minutes and allow to cool on a wire rack.

Chocolate ganache:

8. Chop the chocolate finely and place it in a large bowl. In a saucepan, bring the cream to a boil. Pour half of the boiling cream over the chocolate and mix with a whisk. Add the remaining cream and whisk again. Dice the butter and add it to the ganache. Using a spatula, stir until smooth.

Assembly:

9. Pour a thin layer (2-3 mm) of ganache into the shell. Place the disk of sponge cake on top and press down lightly. Fill to the top with the remaining ganache and allow to rest for 30 minutes to set.

10. Decorate the tart with chocolate shavings (scrape the side of the chocolate bar with the back of a knife to make fine shavings). Shave directly over the tart. Dust lightly with cocoa powder.

Bon appétit!

20 February 2013

Cardamomo-metal-land (raspberry filled dino-chocolates for little metal heads)

(English version below)

Cardamomoland is different. Sí, además de por el tema de la educación, Finlandia destaca por cosas bastante raritas: campeonatos de lanzamiento de móvil, carreras de carga de mujer a cuestas, fútbol en ciénaga, resistencia en sauna... eventos que sin duda merecen un detenido análisis en distintas entradas, si es que alguna vez presencio alguno y os lo puedo contar de primera mano (aunque lo dudo).

Cardamomoland también es número 1 en algo diferente a la educación, aunque en cierto modo derivado de la importancia que se le da a la educación musical en este país. Finlandia es el país del mundo con más bandas de metal por habitante. El metal es un género musical respetado y venerado en esta república. Tanto es así, que hay bandas de metal para niños, bandas compuestas por adolescentes (Sturm und Drang - vídeo debajo), cantantes de metal imagen de marcas de joyas de renombre, músicos de este género que dan clase en la academia de música más prestigiosa de los países nórdicos (la Sibelius Academy, en Helsinki) y así hasta el infinito al cuadrado.


No es difícil que en el hilo musical de un centro comercial suene un hit de la banda de metal de turno en lugar de “Ale-ale-jandrooo...” y que las listas de ventas estén copadas por bandas como Nightwish, Children of Bodom, Apocalyptica, Stratovarius... En esos momentos no hay frío ni oscuridad perpetua y lo único que viene a mi cabeza es: “Cardamomoland mola”.


Uno de los grupos musicales más populares entre los pequeños cardamomenses es Hevisaurus, una banda de dinosaurios que tocan canciones tan geniales como “Mummon mopo” (La moto de la abuela), “Lohikääarme ja ritari” (El dragón y el caballero) o “Viimeinen mammutti” (El último mamut) - vídeo arriba. Esta receta es para todos esos pequeños metaleros (y para sus papás y mamás, que los llevan por el buen camino).


Dino-chocolates


Dino-bombones rellenos de frambuesa para pequeños metaleros


Ingredientes (para 12 dino-bombones):


150 grs de chocolate (40%)
150 ml de zumo de frambuesa
1 gr de agar agar
Unas gotas de aceite de girasol


Modus operandi:


1. Pica el chocolate e introdúcelo junto con unas gotas de aceite de girasol en una manga pastelera desechable. Calienta agua en un cazo hasta que hierva. Retira el cazo del fuego e introduce la manga pastelera en el agua para que se derrita el chocolate.

2. Coloca un trozo grande de papel vegetal sobre la mesa de trabajo. Haz un agujero pequeño en la manga pastelera y rellena los moldes de bombones hasta algo más de la mitad de su capacidad. Dale la vuelta al molde en el aire y deja que caiga el exceso de chocolate sobre el papel (puedes intentar recoger este chocolate sobrante, comértelo a cucharadas, mojar frutas en él o guarrear directamente. Tirarlo... ¡nunca!). Introduce el molde en el frigorífico.

3. Pon a calentar el zumo en un cazo pequeño y cuando empiece a hervir añade el agar agar. Remueve con una cuchara durante un minuto y retira el zumo del fuego. Déjalo templar un poco y vierte una cucharadita de zumo en cada hueco del molde. Llévalo de nuevo al frigorífico durante un par de minutos.

4. Cuando haya cuajado el zumo, cubre cada hueco con más chocolate y lleva al frigorífico una última vez. Desmolda y listo.


Hell yeah!

*****
Dino-chocolates


Cardamom-metal-land


Cardamomland is different. Yes, besides of the education, Finland stands out for very strange stuff: sauna and mobile phone throwing championships, wife carrying races, swamp football... events that deserve a deep analyze in other posts, if I ever witness any of them myself (I doubt it though).

Cardamomland is also the number 1 in something that is apart of the education, but still somehow related to the importance given to the musical education in this country. Finland is the country with the most metal bands per capita in the world. Metal is a respected and worshipped genre in this republic: they have metal bands for kids, teen bands (Sturm und Drang - video below), metal singers who advertise very renowned jewelry trademarks, metal musicians who teach in the most prestigious music academy in the Nordic countries (the Sibelius Academy, in Helsinki) and so on, and on, and on.


It's not unusual that the background music in a shopping center is the hit of the metal band of the moment instead of “Ale-ale-jandrooo...” and that the hit lists are full of bands like Nightwish, Children of Bodom, Apocalyptica, Stratovarius... In those moments there is not cold nor perpetual darkness and all that comes to my mind is: “Cardamomland is cool”.


One of the most popular bands among little Finns is Hevisaurus, a dinosaur band that plays songs as great as “Mummon mopo” (Granny's motorbike), “Lohikäärme ja ritari” (The dragon and the knight) and “Viimeinen mammutti” (The last mammoth) - video above. This recipe is for all those little metal heads (and their mommies and daddies, who put them on the right path).


Dino-chocolates


Raspberry filled dino-chocolates for little metal heads


Ingredients (makes 12 dino-chocolates):


150 g chocolate (40%)
150 ml raspberry juice
1 g agar agar
Some drops of sunflower oil


Modus operandi:


1. Chop the chocolate and place it together with a couple drops of sunflower oil in a disposable piping bag. Heat some water in a pot until boiling point. Then take it away from the heat source and place the piping bag in the water so the chocolate melts.

2. Place a large piece of baking paper on the working surface. Cut a little hole in the piping bag and fill the chocolate molds a bit over half of their capacity. Turn the mold upside down in the air and let the extra chocolate fall on the paper (you can try to reuse that chocolate, eat it with a spoon, dip fruits on it or just play with it. Anything but throwing it away!). Keep the mold in the fridge for a while.

3. Heat the juice in a small pot and when it reaches the boiling point add the agar agar. Stir with a spoon for a minute and take it away from the heat source. Let it cool down a bit and then pour a teaspoon of juice in each mold. Keep it in the fridge for some minutes.

4. When the jelly sets, cover the molds with more chocolate and put them in the fridge for one last time. Unmold the chocolates when they are hard enough and enjoy.


Hell yeah!

07 October 2012

París [+AIG] (chocolate and salt flakes sablés)


Notre-Dame de Paris (2010)


(English version below)

Después de nuestra maratón checa volvimos a casa. Las vacaciones se habían acabado para Herra K… pero no para mí. Todavía me esperaban cuatro maravillosos días en París con mi amiga irreductible. Así que deshice la maleta, eché un sueñecito reponedor de un par de días y la volví a hacer. 

Yo ya había estado en París tres veces antes, cada una en diferente compañía, pero nunca con ella. Así que teóricamente iba a ser su guía, pero como siempre en París, terminé por descubrir sitios donde nunca había estado y vi con otros ojos algunos repetidos hasta la saciedad en cada uno de los viajes anteriores.


Moulin Rouge (2010)


Hicimos mucho turismo (muuucho), comimos macarons de Ladurée, croissants en los Campos Elíseos y un crepe de chocolate, plátano y avellanas que nos alimentó medio viaje. Fuimos de compras, echamos una siestecita en Versalles y bajamos a las profundidades de París en un viaje en el tiempo a las catacumbas. Reímos (mucho) y lloramos (sólo un poquito). Fue un viaje perfecto.

París es una ciudad tan inabarcable que volvería mil veces más. 


Ladurée


Después de terminar con agujetas por cargar a mi cuello con 2 kg de cámara en las etapas anteriores, no me apetecía pegarme este viaje tirando de ese mostrenco otra vez (la primera vale, la segunda también… la cuarta, no). Preferí guardar los recuerdos en mi memoria y sólo hice algunas fotos con una camarita pequeña, más bien malucha, pero que pesaba bastante menos. Resultado: casi todas las fotos borrosas (espero conservar mi memoria por mucho tiempo), así que he decidido completar el post con algunas imágenes del viaje anterior.

La entrada de hoy también va dedicada a mi amiga irreductible. Por ese fantástico viaje y por ser “patrocinadora” de esta receta. Ella me regaló en París una cajita llamada “Petits sablés maison”, que contiene un librito con 5 recetas y un tampón para decorar sablés. La receta de hoy está basada en una llamada “sablés tout chocolat” que viene en el libro.


Sablés de chocolate y escamas de sal


Ingredientes (para unas 25 galletas):

200 grs de harina de trigo
135 grs de mantequilla
30 grs de cacao en polvo
80 grs de azúcar blanquilla
2 yemas de huevo
5 grs de levadura química
½ cucharadita de escamas de sal

Modus operandi:

1. Mezcla la harina, el azúcar, el cacao, las escamas de sal y la levadura en un bol. Añade la mantequilla cortada en dados y amasa presionando y frotando entre las manos. Incorpora las yemas de huevo. Trabaja la masa con los dedos hasta que sea flexible. 

2. Coloca la masa entre dos hojas de papel vegetal y estírala con un rodillo hasta que tenga 3 ó 4 mm de espesor. Mete la masa en el frigorífico durante al menos 1 hora. 

3. Precalienta el horno a 180 C.

4. Corta las galletas con un cortapastas que te guste y colócalas sobre una bandeja de horno cubierta con papel vegetal (si vas a utilizar un tampón, recuerda que debes enharinarlo bien antes de decorar cada galleta). 

5. Hornea las galletas durante 10 – 12 minutos. 

Bon appétit!


Tour Eiffel (2010)

AIG 2012


Quería dedicar una entrada independiente al AIG (Amigo Invisible Gastronómico) pero en vista de que no me da tiempo (la asignación es en un par de días) no me queda más remedio que aprovechar ésta. 

Este es el primer año que participo, el año pasado no pude porque mi blog estaba todavía en pañales, así que tengo ilusión acumulada. Ante todo, quiero agadecer a Joana el esfuerzo y entusiasmo con el que gestiona este sarao (no me puedo imaginar la de emails que recibe, debe ser una locura) y a France, la mamá de Palmira, por el logo.

Y ahora un mensajito para ti, futuro AIG.


"Querido/a AIG:

Muchas gracias por haber llegado hasta aquí. Me imagino que antes habrás pasado por la información del perfil y habrás descubierto que a veces no carburo muy bien (dato que podrás corroborar leyendo un par de entradas al azar), pero soy buena gente, lo prometo. 

Soy chica fácil (¡para regalar!) así que espero no ocasionarte ningún quebradero de cabeza y, considerando lo que valen los gastos de envío de Correos a Cardamomoland, espero que el desaguisado económico tampoco sea muy grande. De antemano te presento mis disculpas por vivir a tomar viento. 

Puedes regalarme lo que mejor te parezca (incluso si consideras que sólo me merezco carbón del malo lo aceptaré igualmente), pero si eres de Asturias y me mandas casadielles estaré en deuda contigo por los siglos de los siglos (igual será la deuda si eres de Mallorca y me mandas sobrasada). No como setas ni pisan mi cocina (tengo un detector y si hay setas en el paquete lo oleré en el aviso), soy alérgica a los kiwis (si quieres matarme te lo estoy poniendo fácil) y no soy fan del fondant y esas cositas (lo siento mucho si adoras los cupcakes y las tartas de 8 pisos…).  No bebo vino ni café. 

Eso es lo que no me gusta. Lo que me gusta… todo lo demás. Sobre todo me gustan las cosas que huelen a cuidado, a esmero, a entusiamo. 

Gracias por todo eso. Estoy deseando conocerte, amigo/a próximamente visible.

Un saludo desde Cardamomoland."


*****
Tour Eiffel (2010)

Paris


After our Czech marathon we went back home. Holidays were over for Herra K… but not for me. Four wonderful days in Paris with my obdurate friend were still to come. So I unpacked, I slept for two days and packed again. 

I had been in Paris three times before, each one in different company, but never with her. So I was supposed to be her guide, but as always in Paris, I ended up discovering new places and looking with different eyes those repeatedly visited before. 


Jardin du Luxembourg (2010)

We visited a lot of places (a loooot), ate macarons in Ladurée, croissants in Champs Élysées and a chocolate, banana and peanut crepe that fed us up for a half of the trip. We went shopping, had a nap in Versailles and went deep inside Paris in a time travel to the catacombs. We laughed (a lot) and cried (only a little bit). It was a perfect trip.

Paris is so immense that I would go back a thousand of times more.


L'Arc de Triomphe (2010)


After finishing with some neck pains because of punishing it with a 2 kg camera on the previous stages, I didn’t really feel like one more trip carrying that monster again (first time ok, second… well, ok, fourth… absolutely no). I decided to keep the memories in my mind and I only made some pictures with a little camera, a pretty bad one, but really light. Result: 90% blurry pictures (I hope I can keep the memories in my mind for a long long time), so I’ve decided to use also some pictures from our trip in 2010.

Today’s post is also dedicated to my obdurate friend, because of that great trip and also because she’s the “sponsor” of this recipe. In Paris she gave me a little box called “Petits sablés maison”, which contains a small book with 5 recipes and a sablés stamp. Today’s recipe is based in one of those, titled “sablés tout chocolat”. 


Chocolate and salt flakes sablés


Ingredients (makes 25 cookies):

200 g plain flour
135 g butter
30 g cacao powder
80 g caster sugar
2 egg yolks
5 g baking powder
½ tsp salt flakes

Modus operandi:

1. Mix the flour, sugar, cacao powder, salt flakes and baking powder in a bowl. Add the butter (diced) and knead pressing and rubbing the dough between your hands. Add the egg yolks and knead the dough with your fingers until flexible. 

2. Put the dough between two baking papers and roll it out using a rolling pin until 3-4 mm thick. Then cool the dough in the fridge for at least 1 hour.
  
3. Preheat the oven to 180 C.

4. Cut the sablés using a cookie cutter of your choice and place them on a baking tray prepared with baking paper (if you’re gonna use a stamp, remember that you should flour it properly before cutting each cookie). 

5. Bake the sablés for 10 – 12 minutes. 

Bon appétit!

29 August 2012

Cosas que pasan (Geisha Dark “magdalenas”)


(English version below)

Esta es una parada forzosa en mi periplo vacacional. Entre Praga y París me he dejado caer un par de días por Helsinki y no podía dejar de postear porque ayer mi pequeño bebé cibernético cumplió un año. Y oye, hace ilusión.

Pensé en postear una receta de churros para romper la maldición, pero creedme si os digo que aún no he superado el trauma. Así que aquí os dejo una receta española con corazón finlandés, como este blog, o más bien viceversa.

Los bombones Geisha son unos pralinés muy populares en Finlandia. La empresa Fazer los fabrica desde 1962 y, a pesar de que el chocolate con leche no es lo mío, me encantan. Ahora encima han sacado la versión con cobertura de chocolate negro, con lo cual me han dado donde más me duele. Por desgracia no es fácil encontrarlos todavía, estos los compré en el barco a Tallín y ayer pude corroborar que también los venden en el aeropuerto. Por supuesto, podéis utilizar otros pralinés que os gusten o que tengáis más a mano.

La receta de las magdalenas sigue las fabulosas enseñanzas del maestro Barriga, la proporción de ingredientes básicos y el procedimiento están extraídos de su libro “Magdalenas”.


Magdalenas Geisha Dark


Ingredientes (para 10 magdalenas):

125 grs de huevo (2 huevos grandes)
175 grs de azúcar
60 ml de leche
190 ml de aceite de girasol
210 grs de harina de trigo
7 grs de levadura química
1 cucharadita de esencia de vainilla
Una pizca de sal
10 bombones Geisha Dark

Modus operandi:

1. Bate los huevos y el azúcar utilizando un robot de cocina o una batidora de varillas a velocidad máxima. Reduce la velocidad y añade la leche y la esencia de vainilla sin dejar de batir. Incorpora el aceite batiendo despacio.

2. En un bol aparte, mezcla la harina, la levadura y la sal. Agrega esta mezcla al batido a velocidad lenta. Cuando hayas obtenido una masa homogénea, aumenta la velocidad y bate durante 2 o 3 minutos más. Tapa la masa con un paño y déjala reposar como mínimo 1 hora en el frigorífico (mejor de un día para otro).

3. Precalienta el horno a 250 C.

4. Remueve enérgicamente la masa con unas varillas manuales. Llena los moldes para magdalenas con una manga pastelera (también pueden rellenarse con cuchara) hasta la mitad de su capacidad. Coloca un bombón en el centro de cada madgalena y empújalo ligeramente hacia abajo con el dedo. Termina de llenar los moldes hasta ¾ de su capacidad, cuidando que los bombones queden totalmente cubiertos de masa.

5. Hornea las magdalenas a 210 C durante 14-16 minutos.

*****


Things happen

This is a necessary stop in my holidays tour. Between Prague and Paris I came home for a couple of days and I couldn't avoid publishing because yesterday it was my little cybernetic baby's birthday. One year. And yes, it's somehow exciting.

I thought about posting a churros recipe to break the curse, but believe me, I haven't gone over the trauma yet. So here you have a Spanish recipe with a Finnish heart, like this blog, or (more correctly) vice versa.

Geisha chocolates are a very popular pralines in Finland. The company Fazer has been making them since 1962 and, even though milk chocolate is not my cup of tea, I love them. Now they have started to sell the version with dark chocolate cover, so they've touched me deep inside. Unfortunately it's not easy to find them yet, these ones were bought in the boat to Tallinn and yesterday I could check that you can buy them also at the airport. Of course you can use other pralines, those that you like the most or are easier to find.

The magdalenas recipe follows the great lessons by master Barriga, the proportion of basic ingredients and the process are taken from his book “Magdalenas”.


Geisha Dark “magdalenas”


Ingredients (makes 10):

125 g egg (2 large eggs)
175 g caster sugar
60 ml milk
190 ml sunflower oil
210 g plain flour
7 g baking powder
1 tsp vanilla essence
A pinch of salt
10 Geisha Dark chocolates

Modus operandi:

1. Whisk the eggs and the sugar using a robot or an electric mixer at high speed. Reduce the speed and add the milk and the vanilla essence (don’t stop whisking). Add the oil at low speed.

2. In another bowl, mix the flour, baking powder and salt. Add this mixture to the bowl of the eggs at low speed. When all the ingredients are well mixed, increase the speed and whisk for 2 or 3 minutes. Cover the batter with a tea towel and let it stand at least 1 hour in the fridge (better overnight).

3. Preheat the oven to 250 C.

4. Beat the batter vigorously with a whisk. Fill the muffin cases using a piping bag (you can also do it with a spoon) until half of the capacity. Place a chocolate in the center of each magdalena and push it lightly down with your finger. Fill the cases until ¾ of the capacity, taking care that the chocolates are totally covered by batter.

5. Bake the magdalenas at 210 C for 14-16 minutes.


06 June 2012

Verdades (Daim cake)


(English version below)


Cuando uno emigra aprende mucho, obtiene verdades, y eso, sean agradables o amargas, siempre es bueno. Verdades sobre tu modo de vida, acerca del país que dejas atrás o del que tienes por descubrir. Familia, amigos, trabajo, costumbres.

Parece que hoy estoy un poco profunda y es que la ocasión lo merece. Hace ya casi un año que estoy por aquí y muchas cosas han cambiado en mi vida. Muchísimas. Pero otras siguen ahí, irreductibles.

Hoy la cosa va de amigos. De los de primera y de los de segunda. Algunos los denominan amigos y conocidos, otros llaman amigo muy fácilmente y otros cuentan a sus amigos con los dedos de las manos. Crees que conoces a tus amigos, que los identificas, sabes los que te pueden fallar, los que estarán ahí para siempre, los que nunca fueron. Algunos te tienen presente, otros te olvidan conforme cruzas la puerta de embarque.

Y los de verdad siguen ahí, irreductibles.

Esto va para ti, mi amiga irreductible. Feliz cumpleaños.


Daim cake


Receta de Signe Johansen, extraída del libro “Secrets of Scandinavian Cooking... Scandilicious”.

Ingredientes:

75 grs de chocolate con leche con Daim (o barras Daim picadas)
50 grs de mantequilla
75 grs de brunost – queso noruego – (o chocolate con leche)
200 grs de almendras molidas
2 cucharadas de cacao en polvo
1 cucharadita de levadura química
1 pizca de sal
3 huevos medianos
200 grs de azúcar glass
1 cucharadita de esencia de vainilla

Para la cobertura:

100 grs de chocolate con leche con Daim (o barras Daim picadas)
50 grs de mantequilla o aceite de coco
1 cucharada de cacao en polvo
¼ cucharadita de esencia de vainilla
1 paquete de bolas Daim

Modus operandi:

1. Precalienta el horno a 180 C. Engrasa un molde redondo de 20 cm de diámetro.

2. Derrite juntos el chocolate con leche, la mantequilla y el brunost al baño maría. Retira el bol del baño maría y deja enfriar. Por otro lado, mezcla las almendras molidas, el cacao en polvo, la levadura y una pizca de sal en un bol mediano. En otro bol, bate los huevos con el azúcar glass y la esencia de vainilla hasta que blanqueen.

3. Vierte con cuidado la mezcla de chocolate en el bol de los huevos (je), remueve un par de veces y añade los ingredientes secos, mezclando con movimientos envolventes 6-8 veces hasta que la mezcla parezca uniforme. Vierte la mezcla final en el molde y hornéalo a altura media durante 20-25 minutos, hasta que esté firme al tacto y el pastel empiece a separarse de los bordes del molde.

4. Saca el pastel del horno y déjalo enfriar en el molde mientras preparas la cobertura. Derrite el chocolate con leche y la mantequilla (o el aceite de coco) al baño maría y añade el cacao en polvo y la esencia de vainilla. Haz agujeros con un palillo en la superficie del pastel y vierte la mitad de la cobertura mientras está todavía caliente. Espera un momento a que la mezcla penetre en los agujeros y entonces vierte el resto de la cobertura sobre el pastel. Decora con las bolas Daim.

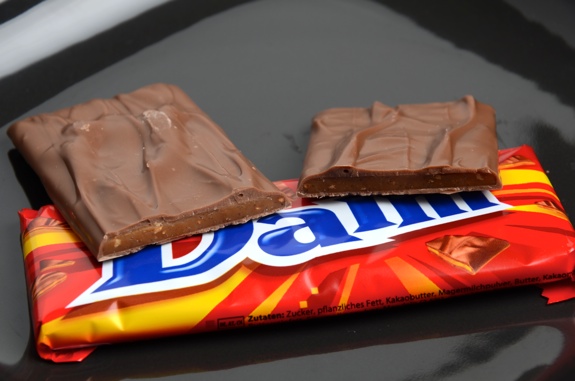
*Las barras Daim son unas chocolatinas originarias de Suecia y Noruega muy consumidas en los países nórdicos. No sé si se comercializan en otros países pero me consta que Ikea las vende en España. El chocolate con leche con Daim que he usado es de la marca Marabou, pero creo que hay otra versión producida por Milka.

*El chocolate con leche con Daim se puede sustituir por barras Daim picadas, y el brunost por chocolate con leche.

*El tiempo de horneado que he indicado en la receta es el que viene en el libro pero yo tuve que echarle 10 minutos más (de hecho el primer intento fue un fracaso, pero aquí lo tengo, cabezona que es una).

*El pastel es sólo para los muy chocolateros, es muy dulce y denso (gana mucho al día siguiente). La autora recomienda consumir el pastel con una cucharada de nata agria.

*Scandilicious es un libro repleto de recetas de inspiración nórdica, con un toque personal muy interesante y unas fotografías preciosas. Y trae una receta que se llama “Brownies Valhalla” y qué queréis que os diga, yo con eso ya tengo bastante.

*****


Truths

To emigrate makes you learn a lot, you get new truths and, bitter or sweet, that's always good. Truths about your way of living, the country you leave behind or the one you are going to discover. Family, friends, work, traditions.

It seems today I'm thinking a little bit too deeply but this day deserves it. I came here almost one year ago and a lot of things have changed in my life. A big lot. But others stay there, obdurately.

Today this is about friends. About first and second class friends. Some people call them friends and acquaintances, other people use the word “friend” very easily, others never do. You think you know your friends, you identify them, you know those who will probably fall, those who will stay there forever, those that never were. Some of them have you in their minds, others just forget you while you cross the boarding gate.

But true friends stay there, obdurately.

And this is for you, my obdurate friend. Happy birthday.


Daim cake


Recipe by Signe Johansen, from the book “Secrets of Scandinavian Cooking... Scandilicious”.

Ingredients:

75 g milk chocolate with Daim (or chopped up Daim bar)
50 g butter
75 g brunost – Norwegian brown cheese – (or milk chocolate)
200 g ground almonds
2 tbsp cocoa
1 tsp baking powder
1 pinch of salt
3 medium eggs
200 g icing sugar
1 tsp vanilla extract

For the topping:

100 g milk chocolate with Daim (or chopped up Daim bars)
50 g butter or coconut oil
1 tbsp cocoa
¼ tsp vanilla extract
1 pack of Daim balls

Modus operandi:

1. Preheat the oven to 180 C. Lightly oil a 20 cm round cake tin.

2. Put the milk chocolate, butter and brunost in a bain-marie and melt together until smooth. Remove the bowl from the heat and allow to cool. Mix the almonds, cocoa, baking powder and a pinch of salt in a medium bowl. In a separate bowl, whisk the eggs, icing sugar and vanilla extract until pale and fluffy.

3. Carefully pour the melted chocolate into the eggs mixture, stir a couple of times and then add the dry ingredients, folding through 6-8 times until the mixture looks even. Pour the cake batter in to the tin and bake on the middle shelf of the oven for 20-25 minutes until it feels firm to the touch and the cake starts to separate from the sides of the cake tin.

4. Remove the cake from the oven and leave to cool in its tin while you prepare the topping. Melt the milk chocolate and butter (or oil) in a bain-marie and then stir in the cocoa and vanilla extract. While the topping is still warm, pierce the cake with a skewer and spread half the frosting over it. Allow a few moments for the molten topping to sink into the holes and then use the rest to spread a second layer on the cake. Decorate with Daim balls.

*Daim bars are a very famous chocolate bars from Sweden and Norway and they are very popular in Nordic countries. I don't know where else you can find them, but I'm sure Ikea sells them in Spain. The milk chocolate with Daim I've used is the one from Marabou, but I guess Milka sells it also.

*The milk chocolate with Daim can be replaced with chopped Daim bars, and the brunost with mik chocolate.

*The baking time indicated in the recipe is the one from the book, but I needed 10 minutes more (actually the first try was a total disaster, but here it is, I'm a bit stubborn).

*This cake is only for true chocolate lovers, it's very sweet and thick (much better the next day). The author recommends to serve it with a dollop of sour cream.

*Scandilicious is a book full of Nordic inspired recipes, with a very interesting personal touch and beautiful pictures. And it contains a recipe called “Valhalla Brownies” and that's more than enough for me!

Related Posts Plugin for WordPress, Blogger...