Showing posts with label libros. Show all posts

06 March 2013

Amigos invisibles que saben lo que hacen (Ladurée's tarte tout chocolat)

(English version below)

Me imagino que os estaréis preguntando qué es esto de amigos invisibles en el mes de marzo... tenía que haberme puesto con las manos en la masa después de nochebuena pero tengo que reconocer que tenía miedito. Os pongo en antecedentes:

Mi familia por parte de madre es así un poco, como decirlo... multitudinaria. Después de décadas volviéndonos locos buscando regalos para todos, las navidades pasadas por fin llegó el amigo invisible (grandísima idea cuando tu madre tiene 6 hermanos con sus parejas y correspondiente prole). Papelitos para todos. Abro mi papelito y... ¡tachán! Mi hermano. De veintipico me tenía que tocar mi hermano, con lo cual deduje que es una persona con mucha suerte.

Llegó el momento de la verdad, nos dimos los regalitos y resultó que mi amigo invisible era... mi hermano. Supongo que no volverá a repetirse una coincidencia así en otras cuantas décadas, pero el caso es que estuvo muy muy bien. Se ve que ha desarrollado un paladar gourmet y me regaló con muchísimo acierto Sucré de Ladurée. 


Ladurée's Sucré


Vale, lo tenía en mi lista de Amazon.

Si alguien de mi familia está leyendo esta entrada, le recomiendo que cierre el navegador o su ordenador de autodestruirá en 3...

2...

1...

Vaaaaaale... se lo pedí yo.

El caso es que él me lo regaló con mucho amor y más pasta y me hizo muy feliz. Además se encargó de hojearlo y decirme: “Tienes que hacer esta tarta”. Si normalmente sus deseos son órdenes para mí, esta vez con mucho más motivo, así que le prometí que la primera receta que hiciera sería esa. Y claro, cuando la leí paso por paso me dió un no-sé-qué-qué-sé-yo que siempre que me iba a poner al lío me decía “mañana”.

Pero aquí está, y aunque es una tarta bastante laboriosa os aseguro que no es tan fiero el león como lo pintan. Y es de Ladurée. Y está buenísima. Pero buenísima no de... “mira qué buena esta tarta”, no, buenísima de tocar el nirvana con los dedos llenos de chocolate.

Paula, estás invitada a merendar.


Tarte tout chocolat

Tarta tout chocolat de Ladurée


Ingredientes:

Para la base:

200 grs de harina de trigo (y un poco más para espolvorear)
120 grs de mantequilla, muy fría (y un poco más para engrasar)
75 grs de azúcar glass
25 grs de almendas molidas
12 grs de cacao en polvo sin azúcar
1 pizca de flor de sal
1 huevo

Para el bizcocho:

45 grs de chocolate (60 – 70%)
3 huevos
65 grs de azúcar blanquilla

Para la ganache de chocolate:

300 grs de chocolate (65% - 75%)
300 ml de nata para montar
100 grs de mantequilla a temperatura ambiente

Para decorar:

1 tableta de chocolate
Cacao en polvo


Modus operandi:

Base:

1. Tamiza la harina en un cuenco grande. Añade la mantequilla cortada en daditos junto con el azúcar glass, las almendras, el cacao y una pizca de flor de sal. Trabaja los ingredientes con las palmas de las manos hasta conseguir una textura arenosa. Añade el huevo y mezcla (sólo hasta que los ingredientes estén integrados, no hay que pasarse de amasado). Haz una bola con la masa, envuélvela en film y ponla a enfriar en la nevera durante al menos 1 hora (mejor de un día para otro).

2. Engrasa y enharina un molde de tarta de 24 cm de diámetro. Enharina la superficie de trabajo y estira la masa hasta que tenga un grosor de 2 mm. Colócala en el molde y déjala enfriar en la nevera durante 1 hora.

3. Precalienta el horno a 170 C.

4. Pincha la masa con un tenedor para que no suba. Coloca un círculo de papel vegetal sobre la masa y cúbrelo con garbanzos o pesos. Hornea durante 25 minutos. Retira los pesos y el papel y deja la base enfriar completamente.

Bizcocho:

5. Funde el chocolate al baño maría. Separa las yemas de las claras. En un cuenco grande, mezcla las yemas con 35 grs de azúcar hasta que espumen. Por otro lado, monta las claras hasta que espumen, entonces añade el resto del azúcar y sigue montando hasta que estén bien firmes. Añade ¼ de las claras al cuenco de las yemas. Vierte el chocolate y agrega el resto de las claras. Mezcla con movimientos envolventes.

6. Precalienta el horno a 170 C.

7. Coloca la mezcla en una manga pastelera con una boquilla lisa. En una bandeja preparada con papel vegetal, dibuja un disco de masa de 2 cm de diámetro menos que la base. Hornea durante 15 minutos y deja el bizcocho enfriar sobre una rejilla.

Ganache de chocolate:

8. Corta el chocolate finamente y disponlo en un cuenco grande. Calienta la nata en un cazo hasta que hierva. Vierte la mitad de la nata sobre el chocolate y mezcla con unas varillas. Añade el resto de la nata y vuelve a mezclar. Corta la mantequilla y añádela a la ganache. Remueve con una espátula hasta que la mezcla esté suave.

Montaje:

9. Vierte una capa fina (2-3 mm) de ganache sobre la base. Coloca encima el disco de bizcocho y presiona ligeramente. Añade gañache hasta cubrir toda la tarta y déjala reposar durante media hora.

10. Decora la tarta con láminas de chocolate (araña los laterales de la tableta de chocolate con el lomo de la hoja de un cuchillo – la parte que no corta – para conseguir láminas finas), cortándolas directamente sobre la tarta. Espolvorea ligeramente con cacao en polvo.

Bon appétit!


*****
Tarte tout chocolat


A very smart secret Santa


I guess you might be wondering what is this secret Santa stupidity in march... yep, I should have done this before, right after Christmas, but I have to admit that I was a bit scared. Let's start from the beginning:

My family on my mother's side is quite... how could I say it... massive. After decades going crazy looking for gifts for everybody, last Christmas we finally played the secret Santa game (a great idea when your mother has 6 siblings – and they have husbands/wives and kids). Papers for everybody. I opened my paper and... voilá! My brother. 20 something papers in the basket and I got my brother (in that moment I thought how lucky he was).

The moment of the truth came, we got our gifts and it happened that my secret Santa was... my brother. I suppose that a coincidence like that won't be repeated in a bunch of decades more but it was nice. Very nice. It seems my brother has become a gourmet or something like that and he bought a great book for me: Ladurée's Sucré.

Ok, it was in my Amazon wish list.

If anyone from my family is reading this post, you should close the window right away or your computer will self-destruct in 3...

2...

1...

Ok, ok. I asked it myself.

The point is that he bought it for me with a lot of love and more money. He even checked it and told me: “you have to make this pie”. And as I can never say “no” to him (and even less this time), I promised him that it would be the first recipe I would make from the book. Yep, I did. But then I read it and I don't know what happened, but every time I was going to start baking it I thought: “tomorrow”.

But here it is and even though it's quite laborious I promise it's not as hard as it looks. And it's Ladurée's. And it's luscious. But not like... “hey, this is delicious”, it's more like touching nirvana with your fingers dipped in chocolate.

Paula, you can take your piece.


Ladurée's Tarte tout chocolat


Ingredients:

For the tart dough:

200 g plain flour (and some more to dust)
120 g butter, very cold (and some more to grease the pan)
75 g icing sugar
25 g ground almonds
12 g unsweetened cocoa podwer
1 pinch of fleur de sel
1 egg

For the sponge cake:

45 g chocolate (60 – 70%)
3 eggs
65 g caster sugar

For the chocolate ganache:

300 g chocolate (65% - 75%)
300 ml whipping cream
100 g butter, at room temperature

For the decoration:

1 chocolate bar
Cocoa powder


Modus operandi:

Tart dough:

1. Shift the flour into a large bowl. Add the butter, cut into small dices, the icing sugar, the almonds, the cacao and a pinch of fleur de sel. Using the palm of your hands, work the ingredients together until they resemble fine grain. Then add the egg and combine just until homogeneous (don't overwork). Form the dough into a ball and wrap it. Refrigerate for a minimum of 1 hour (better overnight).

2. Butter and flour a 24 cm tart pan. Dust the working surface with flour, roll the dough out to 2 mm thick and gently press it into the pan. Allow to rest in the refrigerator for 1 hour.

3. Preheat the oven to 170 C.

4. Prick the surface of the dough with a fork. Fit a round piece of baking paper over the dough and place dried beans or weights on top. Bake for 25 minutes. Remove the weights and the baking paper. Allow to cool.

Sponge cake:

5. Melt the chocolate in a heatproof bowl set over a pan of simmering water. Separate the egg whites and the yolks. In a large bowl, mix the yolks with 35 g of sugar and beat until frothy. In another bowl, whip the whites until frothy, add the rest of the sugar and continue whipping until firm. Pour ¼ of the whites into the yolks mixture. Fold in the chocolate and add the remaining whites. Combine gently.

6. Preheat the oven a 170 C.

7. Line a baking sheet with baking paper and transfer the chocolate batter to a piping bag fitted with a plain tip. Pipe a disk of batter 2 cm smaller than that of the shell. Bake for 15 minutes and allow to cool on a wire rack.

Chocolate ganache:

8. Chop the chocolate finely and place it in a large bowl. In a saucepan, bring the cream to a boil. Pour half of the boiling cream over the chocolate and mix with a whisk. Add the remaining cream and whisk again. Dice the butter and add it to the ganache. Using a spatula, stir until smooth.

Assembly:

9. Pour a thin layer (2-3 mm) of ganache into the shell. Place the disk of sponge cake on top and press down lightly. Fill to the top with the remaining ganache and allow to rest for 30 minutes to set.

10. Decorate the tart with chocolate shavings (scrape the side of the chocolate bar with the back of a knife to make fine shavings). Shave directly over the tart. Dust lightly with cocoa powder.

Bon appétit!

10 December 2012

3, 2, 1... ¡Feliz Navidad! (Italian biscuits)

(English version below)

¡Buenas! Vengo para deciros hola y casi adiós, como siempre que llega el día antes de un viaje, se me ha amontonado el trabajo y la lista de pendientes, así que paso sólo a invitaros a galletas y a felicitaros las fiestas.

Esta madrugada vuelvo a la madre patria, así en plan “El Almendro”, aunque creo que en casa de mi señora madre todavía no hay árbol de Navidad ni abastecimiento de turrones (pero todo llegará). Como siempre, hice propósito de publicar recetas y tengo unas cuantas en la recámara, pero como sé que eso no va a pasar, ni siquiera me voy a llevar las fotos y así evito oscuras tentaciones.

La receta de hoy es fácil de necesidad y perfecta para aprovechar claras de huevo que nos sobren de otra preparación. La he sacado de “Pastry”, del maestro Bertinet, un libro que os puedo asegurar ha dado muchísimas satisfacciones a nuestros estómagos y que os recomiendo encarecidamente si lo vuestro son las tartas y los hojaldres.

Y con esto y un bizcocho... digo, unas galletas... ¡Feliz Navidad!


Italian biscuits


Galletas italianas


(Receta de Richard Bertinet, extraída del libro “Pastry”)

Ingredientes (para 36 – 40 galletas):


300 grs de azúcar glass (y un poco más para espolvorear)
300 grs de almendras molidas
2 cucharaditas de miel
3 claras de huevo
Mantequilla o spray de pastelería, para engrasar las bandejas
Restos de mermelada de albaricoque, crema pastelera o almendra fileteada


Modus operandi:


1. Mezcla el azúcar glass y las almendras molidas. Añade la miel y las claras de huevo hasta conseguir una masa suave pero firme. Déjala reposar en el frigorífico durante al menos 30 minutos.

2. Precalienta el horno a 150 C y engrasa ligeramente dos bandejas de hornear.

3. Divide la masa en cuatro trozos iguales. Espolvorea azúcar glass sobre la superficie de trabajo y haz un cilindro con cada trozo. Corta cada cilindro en 8 – 10 piezas iguales.

4. Coloca estos círculos de masa en las bandejas engrasadas, presiona con cuidado con el pulgar en el centro de cada galleta, haciendo un pequeño hueco. Rellena los huecos con un poco de mermelada, crema pastelera o almendras fileteadas.

5. Hornea durante unos 15 minutos. Para comprobar que las galletas están listas, saca las bandejas del horno y dales un golpecito suave contra la superficie de trabajo. Si las galletas se mueven, están listas. Déjalas enfriar.


*Bertinet introduce esta receta como una variación de los amaretti y una buena forma de utilizar restos de claras de huevo, mermelada o crema pastelera de otras recetas (la mermelada que yo usé no era de albaricoque y también estaban buenísimas).


*****


3, 2, 1... Merry Christmas!


Hi there! I came to say hello and almost goodbye, as always when I'm traveling my list of things to do is huge so I came here just to invite you to some biscuits and wish you a very happy Christmas.

I'm going back to Spain tomorrow in the early morning and once more I promised to myself that I wouldn't stop posting (I even have the pictures and so on). And yes, once more I'm not going to do it so I won't take the pictures with me to avoid dark temptations.

Today's recipe is a very easy one, perfect to use up any egg whites leftovers from other preparations. I took it from “Pastry”, by master Bertinet, a book that gave us and our stomachs a lot of satisfaction. I really recommend it to you if you are a pastry (sweet or salty, no matter what) lover.

And that's it... Merry Christmas!


Italian biscuits

Italian biscuits


(Recipe by Richard Bertinet, from the book “Pastry”)

Ingredients (makes 36 – 40 biscuits):


300 g icing sugar, plus a little extra for rolling out
300 grs ground almonds
2 tsp honey
3 egg whites
butter or baking spray, for greasing the baking trays.
Leftover apricot jam, crème patissière or flaked almonds


Modus operandi:

1. Mix the icing sugar and ground almonds together. Add the honey and egg whites and mix until you have a smooth, firm dough. Leave to rest in the fridge for at least 30 minutes.

2. Preheat the oven to 150 C and lightly grease two baking trays.

3. Divide the dough into four equal pieces. Dust a work surface with icing sugar and roll each piece of dough into a rough sausage shape. Slice each sausage into 8 – 10 pieces.

4. Lay these rounds of dough on the prepared baking trays, then gently press your thumb into the centre of each so that it leaves an indent. Fill the indents with a  little jam, crème patissière or flaked almonds.

5. Bake for around 15 minutes. To test that the biscuits are ready, take the trays out of the oven and tap them lightly on a work surface. The biscuits should release themselves from the trays. Leave to cool.

*Bertinet introduces this recipe as a variation on amaretti and a good way to use up any egg whites, crème patissière or apricot glaze leftovers (the jam I used wasn't apricot and still they were delicious!).

04 November 2012

Winter is coming... otra vez (medieval pork pie)


(English version below)

La semana pasada cayó la primera nevada de la temporada. Llegó sin avisar, como casi siempre, provocando un montón de accidentes de tráfico (y el consecuente cambio urgente a ruedas de invierno) y el estrés de los traumatólogos de Helsinki, que tuvieron que curar muchos patinazos sin patines. Pero se fue, en tres días volvió a ser otoño y lo será por un tiempo más, pero en ese momento el invierno dijo “esta boca es mía” y sacamos los gorros, las manoplas y los calcetines de lana.

Cuando llega este tiempo me siento una auténtica habitante del Norte, y no me refiero al de Europa precisamente. El invierno está llegando y no sé si va a ser tan chungo como en Invernalia pero el hecho de que ya sea de noche a las 17 horas y que todos los días rocemos los 0 C no me hace sentir muy optimista.

Soy fan declarada de la serie Juego de Tronos y de la saga Canción de Hielo y Fuego, así que cuando este libro cayó en mis manos no pude sino poner el piloto autómatico hacia la caja y pagar la buena pasta que me costó (33 €). A Feast of Ice and Fire es el libro de cocina de Juego de Tronos, una pequeña aventura que comenzó con un blog que recogía todas las reseñas sobre comida de la saga, las transformaba en recetas y las presentaba con unas fotos tan bien ambientadas que te transportaban directamente a esos escenarios fantásticos de George R. R. Martin. El libro se divide en capítulos dependiendo del origen de la receta: el Muro, el Norte, el Sur, Desembarco del Rey, Dorne... y contiene todo tipo de recetas: dulces, saladas e incluso bebidas.

Esta receta está extraída del capítulo del Muro, inspirada en una frase de Sam del libro Choque de Reyes. Para continuar leyendo es imprescindible darle al “play”.


“If I could fly, I'd be back at Castle Black eating a pork pie”.


Tarta medieval de cerdo


Receta de Chelsea Monroe-Cassel y Sariann Lehrer, extraída del libro A Feast of Ice and Fire – The Official Companion Cookbook.

Ingredientes:

675 grs de carne de cerdo picada
4 yemas de huevo
45 grs de grosellas desecadas
80 grs de dátiles picados (peso en limpio)
80 ml de miel
½ cucharadita de sal
2 cucharaditas de jengibre molido
¼ cucharadita de pimienta negra molida

Para la masa:

330 grs de harina de trigo
115 grs de mantequilla sin sal
170 ml de agua
2 yemas de huevo, ligeramente batidas
Una pizca de azafran


Modus operandi:

1. Disuelve el azafrán en el agua. Mezcla la harina y la mantequilla con los dedos hasta que estén prácticamente integrados (el libro dice “hasta que los trozos de mantequilla no sean más grandes del tamaño de migas”), entonces añade las yemas de huevo y el agua con azafrán. Mezcla hasta formar una bola, añadiendo más agua de forma gradual si fuera necesario.

2. Precalienta el horno a 190 C.

3. Fríe la carne en una sartén a fuego medio hasta que pierda el color rosado. Déjala enfriar un poco y mezcla bien con la sal, las yemas de huevo, las especias, las frutas y la miel.

4. Enharina ligeramente la superficie de trabajo, divide la masa en dos y estírala hasta conseguir dos círculos suficientemente grandes para cubrir un molde de tarta. Engrasa el molde y coloca la base. Añade el relleno y coloca encima la otra porción de masa, introduciendo los bordes por debajo de la masa de la base y pellizcándola para que quede bien sellada.

5. Haz unos cortes decorativos en la superficie de la tarta para dejar salir el vapor y hornéala entre 45 minutos y 1 hora, o hasta que esté dorada.


*Esta tarta es muy muy dulce, si no te gustan las combinaciones dulce-salado éste definitivamente no es tu plato.

*Con las cantidades indicadas en la receta la tarta tiene un matiz importante a jengibre, así que si no eres muy amigo de este ingrediente, reduce la cantidad a una cucharadita.

*El libro indica que la receta de la masa sirve para dulce y salado, todavía no la he probado en su versión dulce pero os aseguro que está buenísima.

*Si quieres ver el original de esta receta del blog The Inn at the Crossroads haz click aquí.


Que el invierno nos pille confesados.

*****


Winter is coming... again.


Last week we got the first snow of the season. It arrived with no warning, as always, causing a lot of car crashes (and the urgent change to winter tires) and some stress for the traumatology doctors in Helsinki. But it's gone, in three days autumn came back and it will stay for a little longer, but for a while winter was here and we took the hats, mittens and woolen socks out of the closet.

When winter arrives I feel like a true citizen of the North, and I don't exactly mean from the North of Europe. Winter is coming and I don't know if it's gonna be as hard as in Winterfell but the fact that sun sets at 5 pm and everyday we are close to 0 C doesn't make me feel very optimistic.

I'm a big fan of the TV series Game of Thrones and the saga A Song of Ice and Fire, so when this book fell on my hands I could do nothing else but connect the autopilot to the cashier and pay the good money it costs (33 €). A Feast of Ice and Fire is the cookbook of Game of Thrones, a little adventure that started with a blog that collected all the foods featured in the saga, converted them into recipes and showed them with so good atmosphere that made me feel I was in those fantastic sets of George R. R. Martin. The book is divided in chapters depending on the origin of the recipe: the Wall, the North, the South, King's Landing, Dorne... and it has all kind of recipes: sweet, salty and even drinks.

This recipe is taken from the chapter of the Wall, inspired by a sentence of Sam from the book A Clash of Kings. To continue reading it's important to click “play”.


“If I could fly, I'd be back at Castle Black eating a pork pie”.


Medieval pork pie


Recipe by Chelsea Monroe-Cassel and Sariann Lehrer, from the book A Feast of Ice and Fire – The Official Companion Cookbook.

Ingredients:

675 g ground pork
4 egg yolks
45 g dried currants
80 g chopped dates
80 ml honey
½ tsp salt
2 tsp ground ginger
¼ tsp ground black pepper

For the pastry:

330 g plain flour
115 g unsalted butter
170 ml water
2 egg yolks, slightly beaten
A pinch of saffron


Modus operandi:

1. Dissolve the saffron in the water. Rub the butter into the flour with your fingers until there are only crumb-size pieces of butter left, then add the egg yolks and the saffron water. Stir until entirely incorporated, adding more water very gradually if needed, until everything just sticks together.

2. Preheat the oven to 190 C.

3. Brown the pork in a skillet over medium heat. Let cool slightly, and mix well with the salt, egg yolks, spices, honey and fruits.

4. Dust a working surface and divide the pastry dough into two balls. Roll them out using a rolling pin until you get two circles of dough, large enough to cover a pie mold. Place the pie shell onto a greased mold, add the pork mixture and cover with the lid. Fold the top dough under the edge of the bottom crust and pinch the edges shut.

5. Cut decorative steam holes in the top of the pastry, and bake for 45 minutes to 1 hour, or until golden brown.


*This pie is very, very sweet. If you are not very big fan of bittersweet flavours this is definitely not for you.

*With the ingredients described in the recipe the pie has an important touch of ginger, so if you are not very good friends with it, reduce the amount of ginger to 1 teaspoon.

*The book points that the pastry dough recipe works for sweet and salty pies. I haven't tried the sweet version yet but in this recipe it's delicious!

*If you want to see the original blog version of this recipe at The Inn at the Crossroads click here.


06 June 2012

Verdades (Daim cake)


(English version below)


Cuando uno emigra aprende mucho, obtiene verdades, y eso, sean agradables o amargas, siempre es bueno. Verdades sobre tu modo de vida, acerca del país que dejas atrás o del que tienes por descubrir. Familia, amigos, trabajo, costumbres.

Parece que hoy estoy un poco profunda y es que la ocasión lo merece. Hace ya casi un año que estoy por aquí y muchas cosas han cambiado en mi vida. Muchísimas. Pero otras siguen ahí, irreductibles.

Hoy la cosa va de amigos. De los de primera y de los de segunda. Algunos los denominan amigos y conocidos, otros llaman amigo muy fácilmente y otros cuentan a sus amigos con los dedos de las manos. Crees que conoces a tus amigos, que los identificas, sabes los que te pueden fallar, los que estarán ahí para siempre, los que nunca fueron. Algunos te tienen presente, otros te olvidan conforme cruzas la puerta de embarque.

Y los de verdad siguen ahí, irreductibles.

Esto va para ti, mi amiga irreductible. Feliz cumpleaños.


Daim cake


Receta de Signe Johansen, extraída del libro “Secrets of Scandinavian Cooking... Scandilicious”.

Ingredientes:

75 grs de chocolate con leche con Daim (o barras Daim picadas)
50 grs de mantequilla
75 grs de brunost – queso noruego – (o chocolate con leche)
200 grs de almendras molidas
2 cucharadas de cacao en polvo
1 cucharadita de levadura química
1 pizca de sal
3 huevos medianos
200 grs de azúcar glass
1 cucharadita de esencia de vainilla

Para la cobertura:

100 grs de chocolate con leche con Daim (o barras Daim picadas)
50 grs de mantequilla o aceite de coco
1 cucharada de cacao en polvo
¼ cucharadita de esencia de vainilla
1 paquete de bolas Daim

Modus operandi:

1. Precalienta el horno a 180 C. Engrasa un molde redondo de 20 cm de diámetro.

2. Derrite juntos el chocolate con leche, la mantequilla y el brunost al baño maría. Retira el bol del baño maría y deja enfriar. Por otro lado, mezcla las almendras molidas, el cacao en polvo, la levadura y una pizca de sal en un bol mediano. En otro bol, bate los huevos con el azúcar glass y la esencia de vainilla hasta que blanqueen.

3. Vierte con cuidado la mezcla de chocolate en el bol de los huevos (je), remueve un par de veces y añade los ingredientes secos, mezclando con movimientos envolventes 6-8 veces hasta que la mezcla parezca uniforme. Vierte la mezcla final en el molde y hornéalo a altura media durante 20-25 minutos, hasta que esté firme al tacto y el pastel empiece a separarse de los bordes del molde.

4. Saca el pastel del horno y déjalo enfriar en el molde mientras preparas la cobertura. Derrite el chocolate con leche y la mantequilla (o el aceite de coco) al baño maría y añade el cacao en polvo y la esencia de vainilla. Haz agujeros con un palillo en la superficie del pastel y vierte la mitad de la cobertura mientras está todavía caliente. Espera un momento a que la mezcla penetre en los agujeros y entonces vierte el resto de la cobertura sobre el pastel. Decora con las bolas Daim.

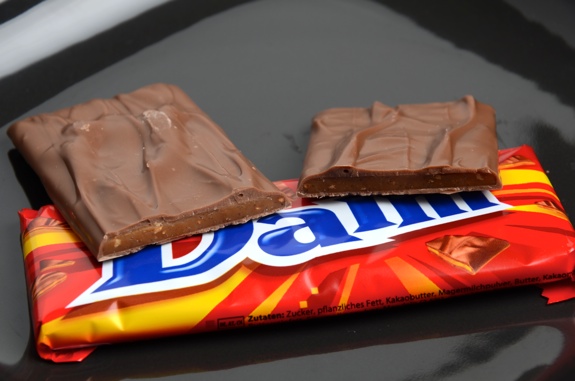
*Las barras Daim son unas chocolatinas originarias de Suecia y Noruega muy consumidas en los países nórdicos. No sé si se comercializan en otros países pero me consta que Ikea las vende en España. El chocolate con leche con Daim que he usado es de la marca Marabou, pero creo que hay otra versión producida por Milka.

*El chocolate con leche con Daim se puede sustituir por barras Daim picadas, y el brunost por chocolate con leche.

*El tiempo de horneado que he indicado en la receta es el que viene en el libro pero yo tuve que echarle 10 minutos más (de hecho el primer intento fue un fracaso, pero aquí lo tengo, cabezona que es una).

*El pastel es sólo para los muy chocolateros, es muy dulce y denso (gana mucho al día siguiente). La autora recomienda consumir el pastel con una cucharada de nata agria.

*Scandilicious es un libro repleto de recetas de inspiración nórdica, con un toque personal muy interesante y unas fotografías preciosas. Y trae una receta que se llama “Brownies Valhalla” y qué queréis que os diga, yo con eso ya tengo bastante.

*****


Truths

To emigrate makes you learn a lot, you get new truths and, bitter or sweet, that's always good. Truths about your way of living, the country you leave behind or the one you are going to discover. Family, friends, work, traditions.

It seems today I'm thinking a little bit too deeply but this day deserves it. I came here almost one year ago and a lot of things have changed in my life. A big lot. But others stay there, obdurately.

Today this is about friends. About first and second class friends. Some people call them friends and acquaintances, other people use the word “friend” very easily, others never do. You think you know your friends, you identify them, you know those who will probably fall, those who will stay there forever, those that never were. Some of them have you in their minds, others just forget you while you cross the boarding gate.

But true friends stay there, obdurately.

And this is for you, my obdurate friend. Happy birthday.


Daim cake


Recipe by Signe Johansen, from the book “Secrets of Scandinavian Cooking... Scandilicious”.

Ingredients:

75 g milk chocolate with Daim (or chopped up Daim bar)
50 g butter
75 g brunost – Norwegian brown cheese – (or milk chocolate)
200 g ground almonds
2 tbsp cocoa
1 tsp baking powder
1 pinch of salt
3 medium eggs
200 g icing sugar
1 tsp vanilla extract

For the topping:

100 g milk chocolate with Daim (or chopped up Daim bars)
50 g butter or coconut oil
1 tbsp cocoa
¼ tsp vanilla extract
1 pack of Daim balls

Modus operandi:

1. Preheat the oven to 180 C. Lightly oil a 20 cm round cake tin.

2. Put the milk chocolate, butter and brunost in a bain-marie and melt together until smooth. Remove the bowl from the heat and allow to cool. Mix the almonds, cocoa, baking powder and a pinch of salt in a medium bowl. In a separate bowl, whisk the eggs, icing sugar and vanilla extract until pale and fluffy.

3. Carefully pour the melted chocolate into the eggs mixture, stir a couple of times and then add the dry ingredients, folding through 6-8 times until the mixture looks even. Pour the cake batter in to the tin and bake on the middle shelf of the oven for 20-25 minutes until it feels firm to the touch and the cake starts to separate from the sides of the cake tin.

4. Remove the cake from the oven and leave to cool in its tin while you prepare the topping. Melt the milk chocolate and butter (or oil) in a bain-marie and then stir in the cocoa and vanilla extract. While the topping is still warm, pierce the cake with a skewer and spread half the frosting over it. Allow a few moments for the molten topping to sink into the holes and then use the rest to spread a second layer on the cake. Decorate with Daim balls.

*Daim bars are a very famous chocolate bars from Sweden and Norway and they are very popular in Nordic countries. I don't know where else you can find them, but I'm sure Ikea sells them in Spain. The milk chocolate with Daim I've used is the one from Marabou, but I guess Milka sells it also.

*The milk chocolate with Daim can be replaced with chopped Daim bars, and the brunost with mik chocolate.

*The baking time indicated in the recipe is the one from the book, but I needed 10 minutes more (actually the first try was a total disaster, but here it is, I'm a bit stubborn).

*This cake is only for true chocolate lovers, it's very sweet and thick (much better the next day). The author recommends to serve it with a dollop of sour cream.

*Scandilicious is a book full of Nordic inspired recipes, with a very interesting personal touch and beautiful pictures. And it contains a recipe called “Valhalla Brownies” and that's more than enough for me!

23 April 2012

El libro de los webos (custard éclairs)

(English version below)

Sí, sí... cuando hablo de los “webos” supongo que ya sabréis que me refiero a Su y MC, creadores de mi blog de cabecera “Webos Fritos”. Y es que venga a hablar de libros extranjeros y de sus excelencias y me estaba dejando lo mejor de lo mejor, “Webos Fritos. Recetas y momentos”.

Tiempo me faltó para ir a comprarme el libro cuando me enteré de que lo sacaban y es que, siguiendo su bitácora desde hace tanto tiempo, sabía que iba a ser un imprescindible para mí. Webos Fritos es un blog al que le tengo un especial cariño, no porque los textos de Su sean geniales, porque las fotos de MC me hagan sentir envidia (y de la mala) o porque sus recetas nunca fallen, sino porque Webos fue el primero.

Un día hace ya unos años, buscando material para un trabajo final de un curso que nada tenía que ver con la cocina, me topé con Webos Fritos y me enganché. A partir de ahí descubrí otros blogs, me apunté a la Escuela, empecé a interesarme por la cocina... y aquí estoy. Esa motivación que ponen en todo lo que hacen es altamente contagiosa; no hay más que ver la tropa de seguidores entregados que tienen. Y no es para menos.


En cuanto al libro, si hay alguna que receta que no me guste será porque lleve setas, porque es una auténtica maravilla. Cada capítulo engancha: “recetas para almas descarriadas”, “sorprende a tu cuñado”, “hoy me siento el mejor chef”...

Ya sólo me queda darles las gracias por todo, por estos éclairs, por las croquetas, por los croissants, por el roscón...


Éclairs de crema pastelera

Receta de Susana Pérez, extraída del libro “Webos Fritos. Recetas y momentos”. Para ver la receta original en Webos Fritos pincha aquí.

Ingredientes:

Para la pasta choux:

130 grs de agua
120 grs de leche
100 grs de mantequilla
1 pellizco de sal
5 grs de azúcar blanquilla
160 grs de harina de repostería
4 huevos medianos

Para la crema pastelera a la vainilla:

400 ml de leche
3 yemas de huevo
75 grs de azúcar blanquilla
30 grs de harina de maíz
Un trozo de corteza de limón
½ cucharadita de esencia de vainilla

Para la cobertura de chocolate:

100 grs de un buen chocolate para fundir


Modus operandi:

1. La pasta choux.

Precalienta el horno a 180 C.

Pon en un cazo la leche, el agua, la mantequilla, la sal y el azúcar. Remueve con unas varillas a fuego medio hasta que esté todo bien integrado. Cuando rompa a hervir, retira del fuego y añade la harina de una sola vez. Remueve con unas varillas y pon a fuego medio para que cueza un poco. Cuando asoma la grasa de la mantequilla está lista.

Retira del fuego y añade uno a uno los huevos, removiendo constantemente con las varillas. No añadas el siguiente hasta que esté bien integrado el anterior.

Vierte la pasta en una manga pastelera de boquilla lisa grande. Sobre papel de hornear, dispón porciones alargadas de unos 8 cm, separadas unas de otras, y hornea unos 30 minutos. Saca a una rejilla cuando estén listos.

2. La crema pastelera.

Separa un vaso de leche. En el resto de la leche pon las 3 yemas de huevo, el azúcar, la harina de maíz y la esencia de vainilla. Remueve con unas varillas y reserva.

Calienta la leche en un cazo con el trozo de cáscara de limón. Cuando vaya a hervir, echa el resto de la mezcla y, con unas varillas, a fuego medio da vueltas hasta que la mezcla vaya espesando (procura no dejar de dar vueltas porque se puede pegar al fondo del cazo). Retira la piel de limón y deja enfriar.

3. La cobertura de chocolate

Funde el chocolate (en el microondas o al baño maría).

4. Montaje

Abre los bastoncillos longitudinalmente por un lado o haz un corte en uno de los extremos. Pon la crema pastelera fría en una manga pastelera y rellena los éclairs.

Pon por encima el chocolate fundido y déjalo endurecer.

¡Larga vida a los Webos!

*****


The book of “Webos Fritos”

The time to talk about an amazing Spanish cookbook has come. I always talk about foreign books and I almost forgot to tell you about this little wonder, “Webos Fritos. Recetas y momentos” (“Fried Eggs. Recipes and Moments”), from the authors of my favorite blog “Webos Fritos” (webos is a pun, meaning something like webggs).

When I noticed they published this book, I ran to the bookstore to get it; I had been following their blog long ago and I was sure this one would be a must have for me. I wasn't mistaken. Webos Fritos is a blog I specially like. Not just because Su's writings are great, not because MC's pictures make me feel true envy and neither because their recipes never fail, but because Webos was the first one for me.

One day, some years ago, looking for stuff for some homework (for a course not related at all with food) I found Webos Fritos and I got totally caught. From that moment on I discovered other blogs, I started going to the School and getting interested about cooking... and here I am. That motivation they put on everything they do is highly contagious; you only need to check the crowd of faithful followers they have. And no wonder why.

About the book, if there is any recipe I don't like it might be a mushrooms one. It's a jewel. Every single chapter is fantastic: “recipes for lost souls”, “surprise your brother in law”, “today I feel the best chef”...

What else can I say? Just thank you for everything, for these éclairs, the croquettes, the croissants...


Custard éclairs

Recipe by Susana Pérez, from the book “Webos Fritos. Recetas y momentos”. To read the original recipe in the blog, click here.

Ingredients:

For the choux pastry:

130 g water
120 g milk
100 g butter
A pinch of salt
5 g caster sugar
160 g plain flour
4 medium eggs

For the vanilla custard:

400 ml milk
3 egg yolks
75 g caster sugar
30 g corn flour
A piece of lemon zest
½ tsp vanilla essence

For the chocolate cover:

100 g high quality chocolate chips


Modus operandi:

1. The choux pastry.

Preheat the oven to 180 C.

Put the milk, water, butter, salt and sugar in a small saucepan. Stir with a whisk at medium heat until everything is well mixed. When it starts to boil, turn off the heat and add the flour at once. Stir with a whisk and put it again at medium heat so it cooks a bit. It's ready when you see the fat of the butter starting to come out.
Turn the heat off and add the eggs, one at a time, stirring with a whisk constantly. Don't add a new one until the previous is completely mixed.

Pour the pastry in a piping bag with a big plane pastry tube. On a baking paper, make 8 cm long portions, separated from each other, and bake for around 30 minutes. Place on a wire rack when ready.

2. The custard.

Separate one glass of milk from the rest. Mix the egg yolks, sugar, corn flour and vanilla essence with the rest of the milk, stir with a whisk and reserve.

Heat the milk (from the glass) with the lemon zest in a small saucepan. When it seems to start to boil, pour the milk mix and stir with a whisk at medium heat until the mixture thickens (don't stop stirring, the custard can stick to the bottom of the saucepan). Take the lemon zest away and let it cool.

3. The chocolate cover.

Melt the chocolate (in the microwave or in a double boiler).

4. Finish.

Cut the pastries lengthwise or make a hole in one side. Put the cold custard in a piping bag and fill the éclairs.

Pour the melted chocolate over the éclairs and let it harden.

Long live the Webos!

16 April 2012

Carga a 300 (chili paprika crackers)

(English version below)

Parece que ha llovido un poco, al menos por aquí, desde mi última entrada. Tengo mis razones, lo prometo. La primera es que me fui de ruta aeroportuaria para darle a mi familia una sorpresa hace un par de semanas y he estado en España diez días a la buena vida. Y claro, como era sorpresa no se lo podía contar a nadie y menos a vosotros. La segunda es que cuando volví con estos crackers debajo del brazo, mi ordenador parecía haber sufrido una muerte súbita, y me ha tocado darle un masaje cardíaco de tres días.

He llegado a la conclusión de que con mi ordenador no se puede tontear. Cuando por fin lo dejo tranquilo unos días (que si me tienes quemado, que estoy harto ya, que necesito mi espacio...) va y se intenta suicidar. Ahora me toca darle amor y mimitos porque de vez en cuando se pone en modo “pues ya no respiro”. En fin...

Hoy os traigo una receta sacada de un libro que me encanta, como buena queso-adicta que soy. Son unas crackers picantes para acompañar una tabla de quesos (o lo que mejor os parezca) del libro “Queso” de Fiona Beckett, que os recomiendo encarecidamente si en una vida pasada fuistes ratones o ratonas, como yo. Tiene un capítulo dedicado a las fondues que va a terminar conmigo en el cardiólogo. 


Así que me llevaré a mi ordenador y de paso que le eche un vistazo.

Crackers de pimentón y guindilla

(Receta del libro “Queso” de Fiona Beckett)

Ingredientes (para unas 14-18 crackers grandes o muchas pequeñitas):

225 grs de harina, y más para espolvorear

50 grs de mantequilla, muy fría y cortada en daditos

75 ml de nata para cocinar

1 cucharadita de levadura química

½ cuchardita de sal

½ cucharadita de pimentón picante

½ cucharadita de cayena en polvo (el libro no indica cantidad, así iban bien pero si las queréis más potentes ya sabéis... libre albedrío)


Modus operandi:

1. Precalienta el horno a 190 C.

2. Mezcla la harina, la levadura y la sal en un cuenco. Añade el pimentón, la cayena y la mantequilla y trabájalo todo con las manos hasta que la masa adquiera una textura de pan rallado. Incorpora la nata.

3. Añade poco a poco tres cucharadas de agua (yo necesité 4) mientras trabajas la mezcla hasta que se forme una bola.

4. Enharina bien la superficie de trabajo, corta la masa en dos y estira cada mitad hasta dejarla muy fina. Corta las crackers con un cuchillo o un cortapastas y colócalas en una bandeja de hornear con papel vegetal (yo las adorné con unas semillas de amapola).

5. Hornea durante 15 minutos o hasta que estén doradas. Deja enfriar en una rejilla.

*Se recomienda acompañar estas crackers con quesos cremosos de sabor marcado, pero así, solas, ya están de muerte.

*****


It seems it has been raining a while since I posted the last time. I have my reasons, I promise. The first one is that I did, once again, the airports route, this time to surprise my family couple weeks ago, so I've been enjoying the good life in Spain for 10 days. And naturally, because it was a surprise, I couldn't say it to anyone, and that includes all of you. The second is that when I came back ready to post these crackers, my computer seemed to have suffered a sudden death, and I had to play cardiopulmonary resuscitation with it for 3 days.

I've reached the conclusion that my computer is not mentally balanced. When I finally leave it alone for some days (“I'm burnt out, annoyed, I need my space...”), it tries to kill itself. Now I have to give it love and care because sometimes it turns to that mood of “I don't wanna breathe”.

Today I bring you a recipe from a book I love, as a good cheese-addict. They are some spicy crackers, to accompany a board full of delicious cheese (or whatever you want), from the book “Cheese” by Fiona Beckett. If in a past life you were a mouse, like me, I truly recommend you this book. It has one chapter dedicated to fondues that is going to make me end up in the cardiologist.

And I'll bring my computer with me, so he can take a look at it too.

Chili paprika crackers

(Recipe from the book “Cheese” by Fiona Beckett)

Ingredients (makes 14-18 big crackers or a lot of little ones):

225 g plain flour, and some more for dusting

50 g very cold butter, diced

75 ml cream

1 tsp baking powder

½ tsp salt

½ tsp hot paprika

½ tsp cayenne powder (the book doesn't specify the quantity, with half a teaspoon they are quite spicy but if you want them hotter you know... free will)


Modus operandi:

1. Preheat the oven to 190 C.

2. Mix the flour, the baking powder and the salt in a bowl. Add the paprika, the cayenne powder and the butter and mix with your hands until the dough gets a texture similar to breadcrumbs. Add the cream.

3. Add 3 tablespoons of water (I needed 4) little by little while you knead the dough, until you get a ball.

4. Dust the working surface generously, cut the dough in two and roll it out until very thin. Cut the crackers with a knife or a cookie cutter and transfer them to a baking tray prepared with baking paper (I decorated them with some poppy seeds).

5. Bake for 15 minutes or until the crackers are golden. Let them cool completely on a wire rack.

*In the book they recommend to eat this crackers with creamy but strong flavored cheeses, but they are absolutely delicious even alone.
Related Posts Plugin for WordPress, Blogger...